Configurations
When I install a new operating system, I commit to spending a decent amount of time getting everything configured ahead of time that I can. As we continue forward with the course I will add more descriptions as we learn more tools. It is very important that you understand two things:
- These configurations are what work for me. What I prefer may be uncomfortable for you, or may not be as efficient for you as it is for me.
- I in no way learned / memorized all of these at once. Whether it is aliases I use in my terminal, or shortcuts I use for text editors, do not try and just “know them all”. Instead, while you get used to things, choose a subset to train yourself with and when you get comfortable with that subset start bringing in more.
I cannot emphasize enough the value in configuring things yourself. From colors, to the shell you use, to what hotkeys you prefer in your Operating System, they only take meaning if they help you and you remember them. This list comes from a few years of me cultivating / changing aspects of my development environment.
Basically, you should plan on changing the below to work for you, not just use it because it is here.
First things First
Make sure you have the base operating system as up to date as possible, and install some
core development tools. When you perform a fresh installation, there usually have been
quite a few updates between what was packaged into the media you just installed (e.g.
the .iso you acquired), and what is available online right now.
All in all, there are three fundamental elements of development I will be teaching you:
- Being comfortable functioning in your terminal.
- Using version control (we will use
gitin this course). - Understanding how to use both a terminal based text editor (we will be learning
vimin this course), and a GUI-based editor.- I prefer Sublime Text, but there are many options. The point is that you will probably prefer to use your GUI-based editor / IDE, but will also need to be able to edit files from your terminal.
# check for / acquire updates
$ sudo dnf check-update
$ sudo dnf upgrade
# install the useful development tools package
$ sudo dnf groupinstall "Development Tools"
# install vim
$ sudo dnf install vim
For Fedora, there is an excellent tool called Fedy
that I use to manage my Sublime Text installation. The one “gotcha” with the code they
host on their website to install is that the password being asked for is the root
password (it comes from the su -c). If you do not know the root password, you
should be able to replace su -c with sudo su -c. As an example, compare the
password you would need to enter with the following commands:
# this command requires the root password
$ su -c 'ls /'
Password:
bin   dev  home  lib64       media  opt   root  sbin  sys  usr
boot  etc  lib   lost+found  mnt    proc  run   srv   tmp  var
# this command requires the password for the user
$ sudo su -c 'ls /'
[sudo] password for sven:
bin   dev  home  lib64       media  opt   root  sbin  sys  usr
boot  etc  lib   lost+found  mnt    proc  run   srv   tmp  var
Once Fedy is installed, let’s install a bunch of goodies including Sublime Text:
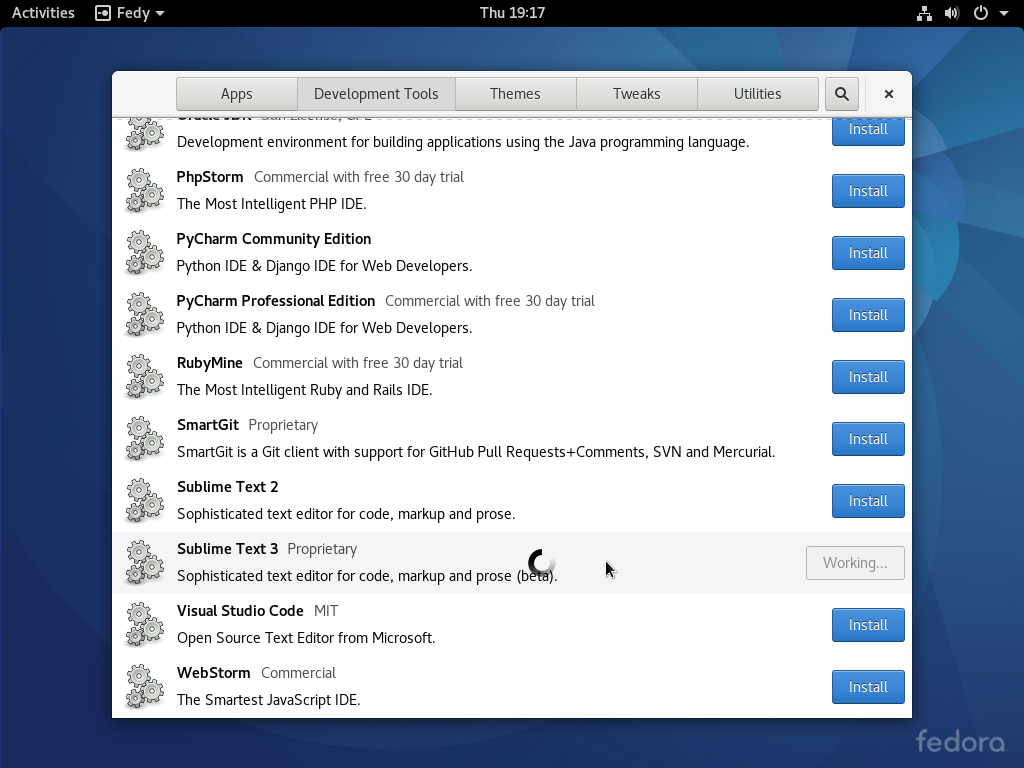
Sublime Text 3
Under the “Development Tools” tab, install Sublime Text 3. If you are still using Sublime Text 2, it’s time to move on.
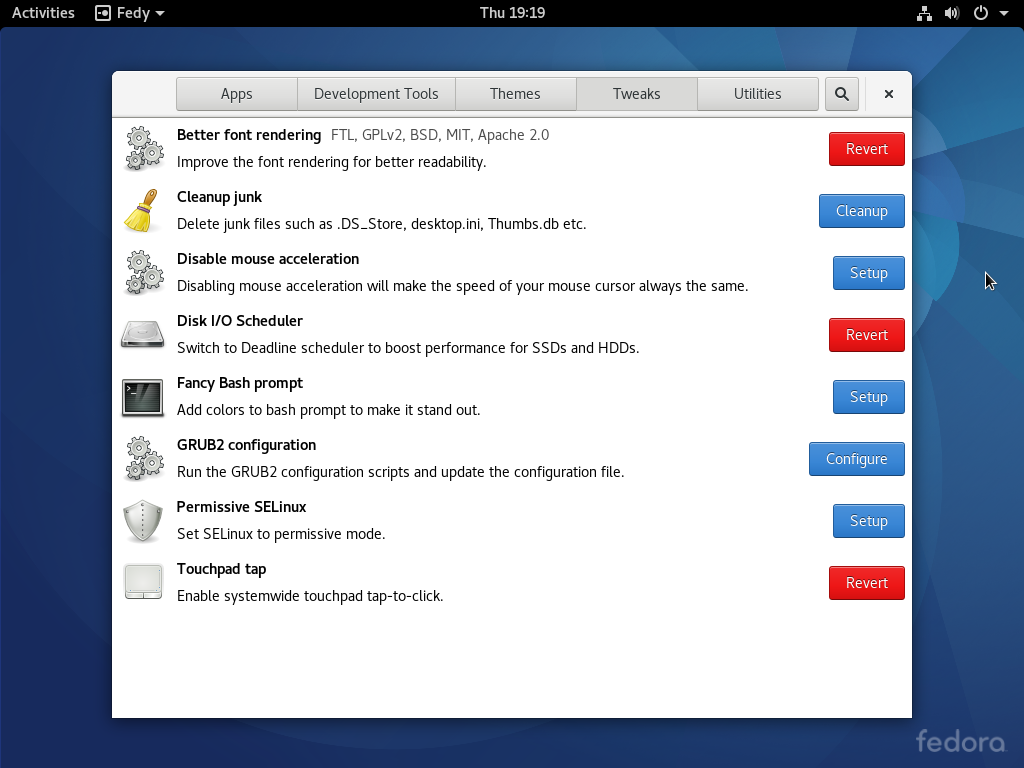
Fedy Tweaks
The ones in the picture that show a red revert button are the ones I insalled. I discourage you from installing the Fancy Bash Prompt, we will learn exactly how to configure this ourselves!
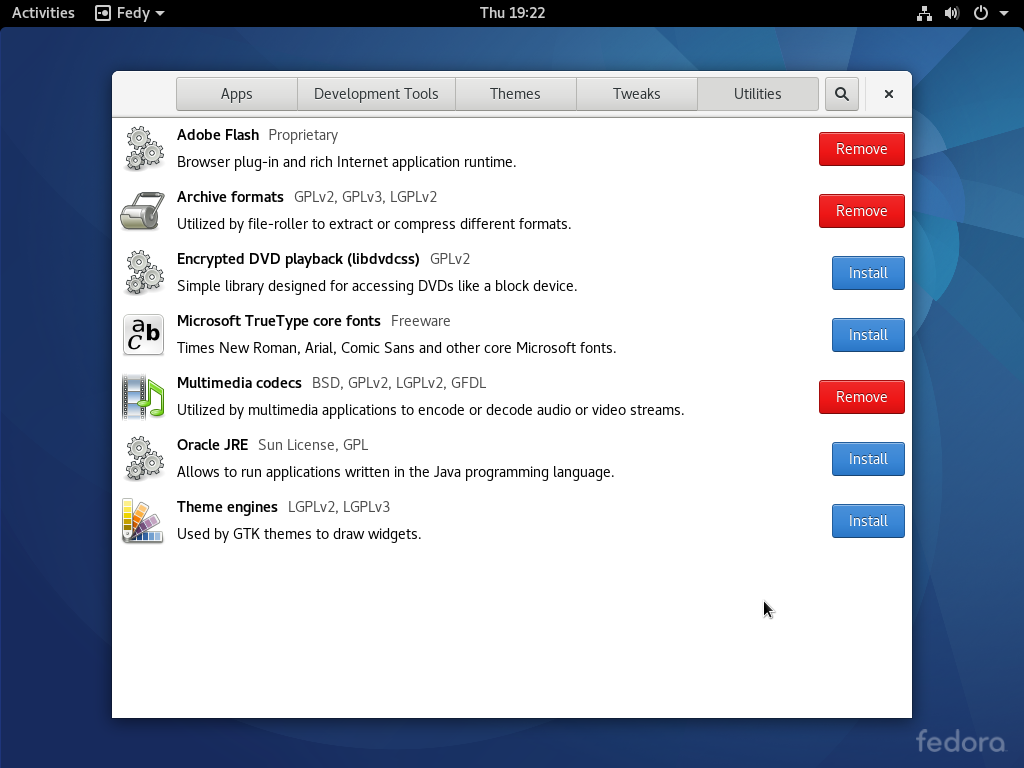
Fedy Utilities
This is by far the easiest way to install Adobe Flash, various useful archive formats, and multimedia codecs. For example, due to legal reasons, the mp3 format cannot be distributed with the Linux kernel. Clicking that little button would allow you to play these files and more.
# check for / acquire updates
$ sudo apt-get update
$ sudo apt-get upgrade
# install the useful build-essential package
$ sudo apt-get install build-essential
# ubuntu does not come with git out of the box for some reason
$ sudo apt-get install git
# install vim
$ sudo apt-get install vim
# install sublime text 3
$ sudo add-apt-repository ppa:webupd8team/sublime-text-3
$ sudo apt-get update
$ sudo apt-get install sublime-text-installer
- Update your operating system through the App Store.
- Instructions can be found here.
-
Install the Command Line Tools. You should already have these if you have already installed XCode. Otherwise, open a terminal and execute
$ xcode-select --installThere will be a pop-up with some license agreements etc. Follow them.
- You should also now have
gitas well asvim. - Download and install Sublime Text 3 for OSX.
Workspaces and Overall Appearance
In my experience, the single most useful thing to configure for a development environment is “Workspaces”. I am not alone in this – as of 2017 it’s pretty much the defacto standard for an operating system to include workspaces. Virtually every desktop manager available for Linux has them, and Windows and Mac also include them too!
All a workspace does is give you another “desktop”. This makes it so that you can keep multiple full-screen applications open, and switch between them by simply switching workspaces. Just having workspaces, though, is not enough (in my opinion). I use a “grid” of workspaces, specifically a 3x3 grid so that I have 9 workspaces total. On a typical day, I normally have my grid setup like this:
|
Top Left
E-mail client
|
Top Center
Internet Browser
|
Top Right
Empty
|
|
Middle Left
Slack / IM Client
|
Middle Center
Sublime / IDE
|
Middle Right
Empty
|
|
Bottom Left
MUSIC!
|
Bottom Center
Terminal
|
Bottom Right
Empty
|
Obviously, how you use it should be what works for you. Because I always configure “wrapping” on my workspaces (if you are in the top-right cell and move one workspace to the right, you end up in top-left), I basically organize things across columns. So with the setup shown above, since I’m mostly using my terminal / editing code / looking things up online, I can very quickly switch between these with no more than two workspace switches. I also tend to leave the right-most column as “filler”, and put items there (e.g. a PDF I’m reading or something).
These have been configured for you already on the course VMs, but it is good for you to know how to replicate / change this. For example, if you are just starting out with a grid setup you might want to dial it back to 2x2 (4 workspaces total). You may also temporarily need more – I was writing a term paper once and ended up switching to 6x6 because there were so many papers I had to keep referring to / citing ;)
Since the tools that we will install to get workspaces give us other options to customize our appearance, we’ll go ahead and get those setup at the same time.
Install gnome-tweak-tool and Download Workspace Grid
Note: I run (and release VMs of) Fedora with the Gnome desktop manager. If you are not using Gnome with Fedora (e.g. you selected KDE), this will not work. On the other hand, if you are using a different flavor of Linux that has Gnome installed, you can follow these instructions!
# install the _excellent_ gnome tweak tool
$ sudo dnf install gnome-tweak-tool
# determine which version of gnome we are running
$ gnome-shell --version
Now that we have gnome-tweak-tool, we can install “Extensions”. The extension we will
install is called Workspace Grid. Visit the
workspace grid downloads page, and download the .zip that
claims support for the output of gnome-shell --version. For example, in the Fedora 25
VM, at the time of installation we were running GNOME Shell 3.22.2, and the latest
release
Go Dark, Setup Workspaces, and More With gnome-tweak-tool
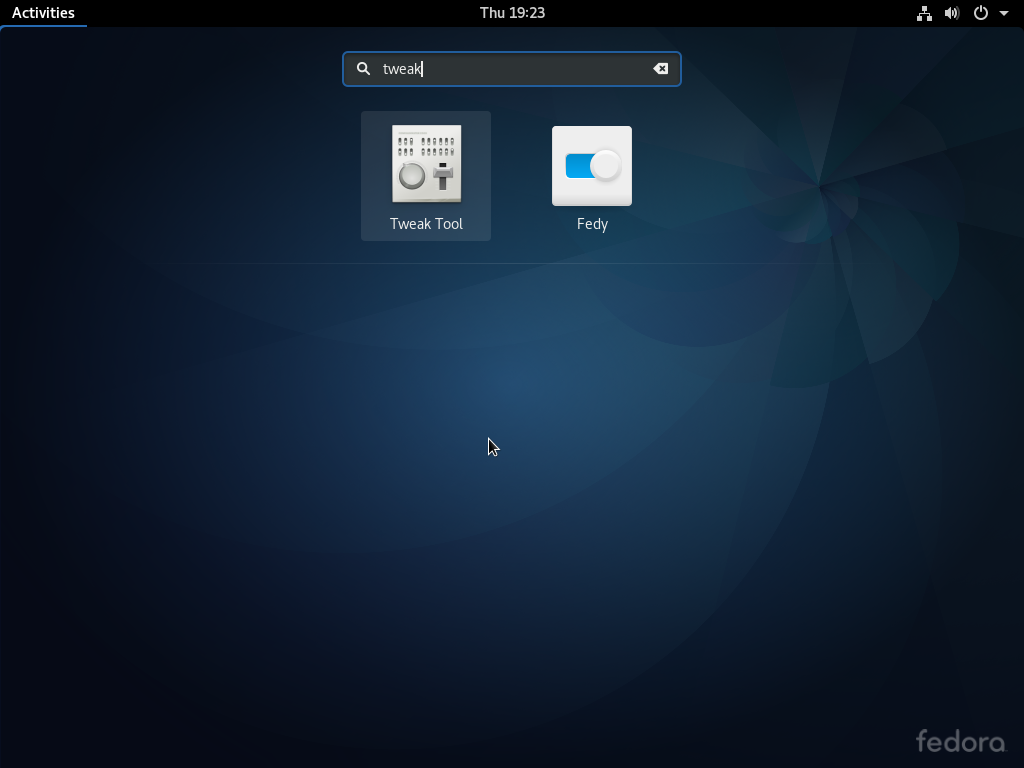
Launch Gnome Tweak Tool
Launch “Activities” (hit the super key) and type tweak, when gnome-tweak-tool is selected hit enter.
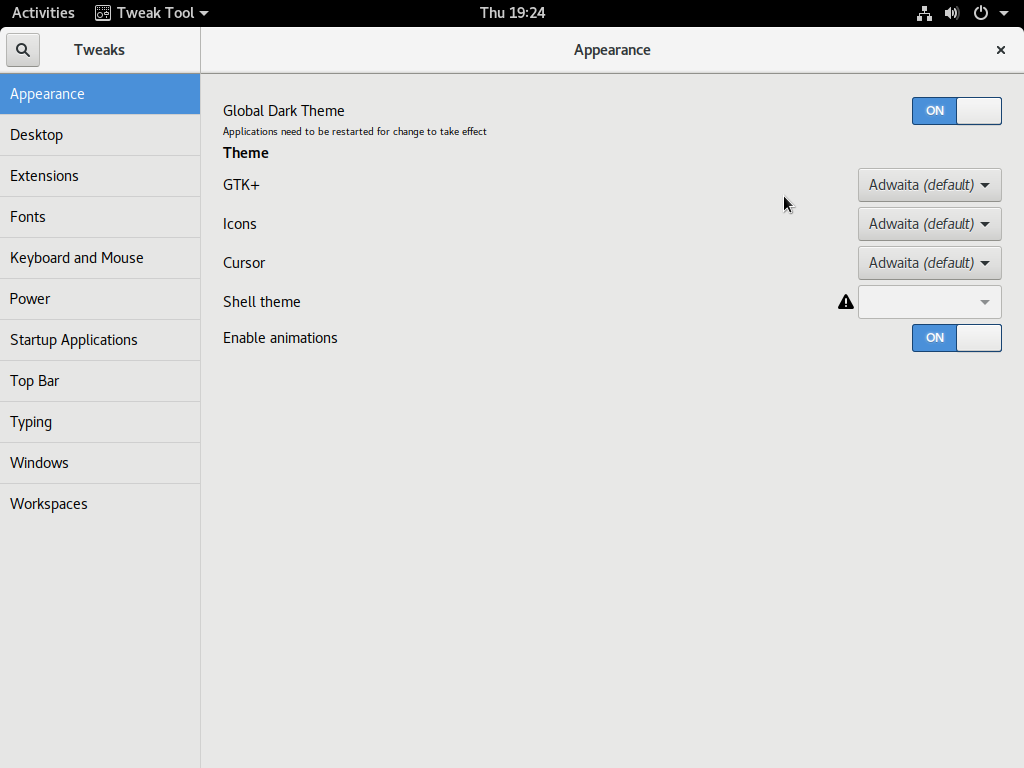
Global Dark Theme!
Under the “Appearance” tab, click the “Global Dark Theme” slider to turn it on. Close gnome-tweak-tool and re-open it to see the effect (as shown in the next image).
Enable Desktop Icons
Click the slider to allow you to see what is on your Desktop (disabled by default).

Change System Font Sizes
If you want to increase / decrease font sizes for various components of the OS, this is the easiest way to achieve it.
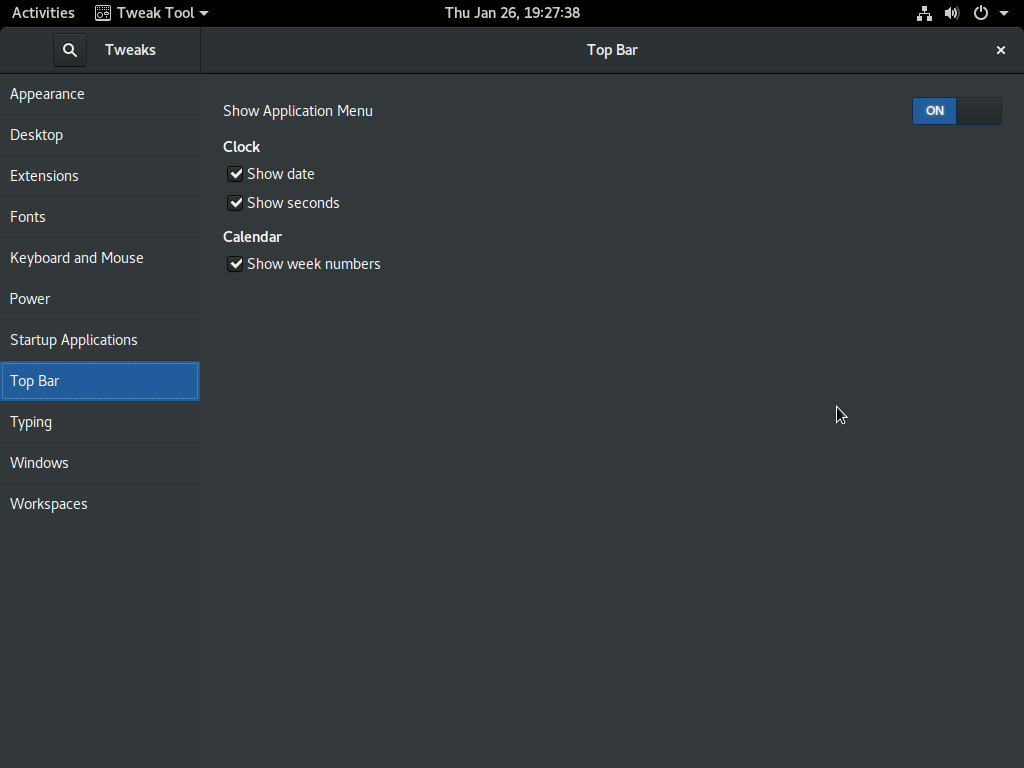
More Explicit TopBar Times
Because why not? The effect of Show week numbers can be seen if you click on the clock in the top-bar to see the calendar.
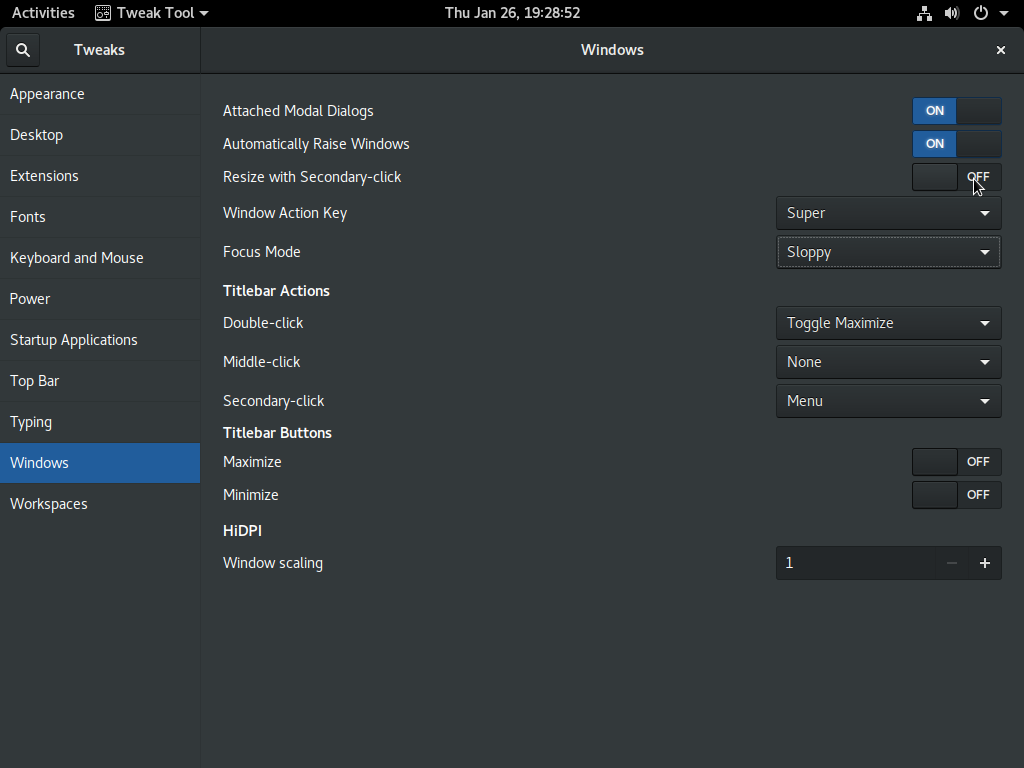
Sloppy Mouse and Auto-Raise
Sloppy focus means that keyboard keys entered will get sent to whatever program the mouse is hovering over. You may strongly dislike this, if so change it back to click. Auto-raise brings the window your mouse is hovering over to the top after a little bit. You may want to disable this too.
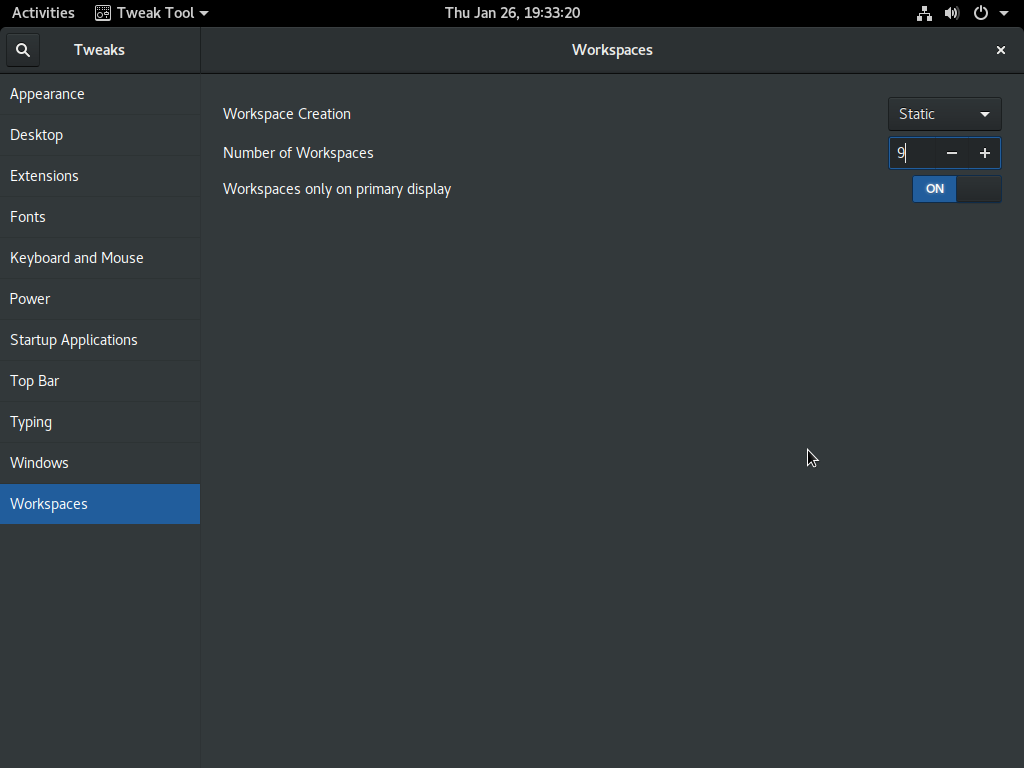
Preparation for Workspace Grid
In order for the Workspace Grid extension to function, we need to set a static number of workspaces. If you wanted to do a 2x2 grid, for example, you would set this to 4 instead of 9.
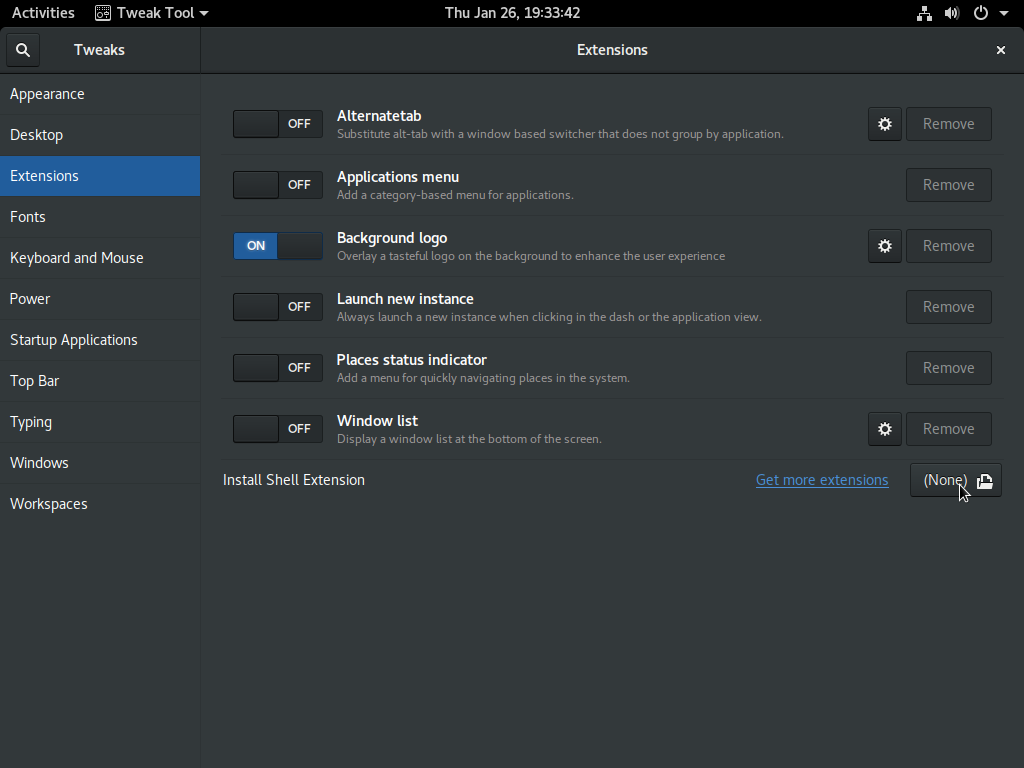
Go to the Extensions Tab
We just downloaded a .zip of the extension we want to install, in the Install Shell Extension row, where the mouse is hovering in the picture, click on the file dialog that says (None).
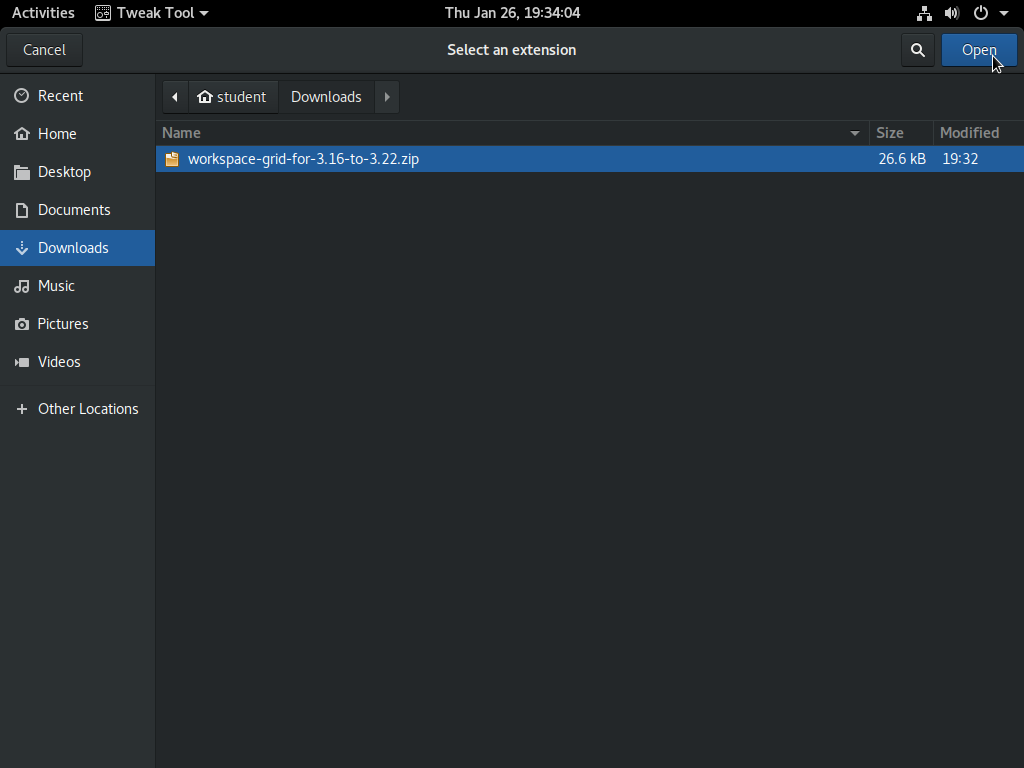
Select the Workspace Grid zip
In your Downloads folder, select the Workspace Grid .zip file that was downloaded and click Open in the top right of the file dialog.
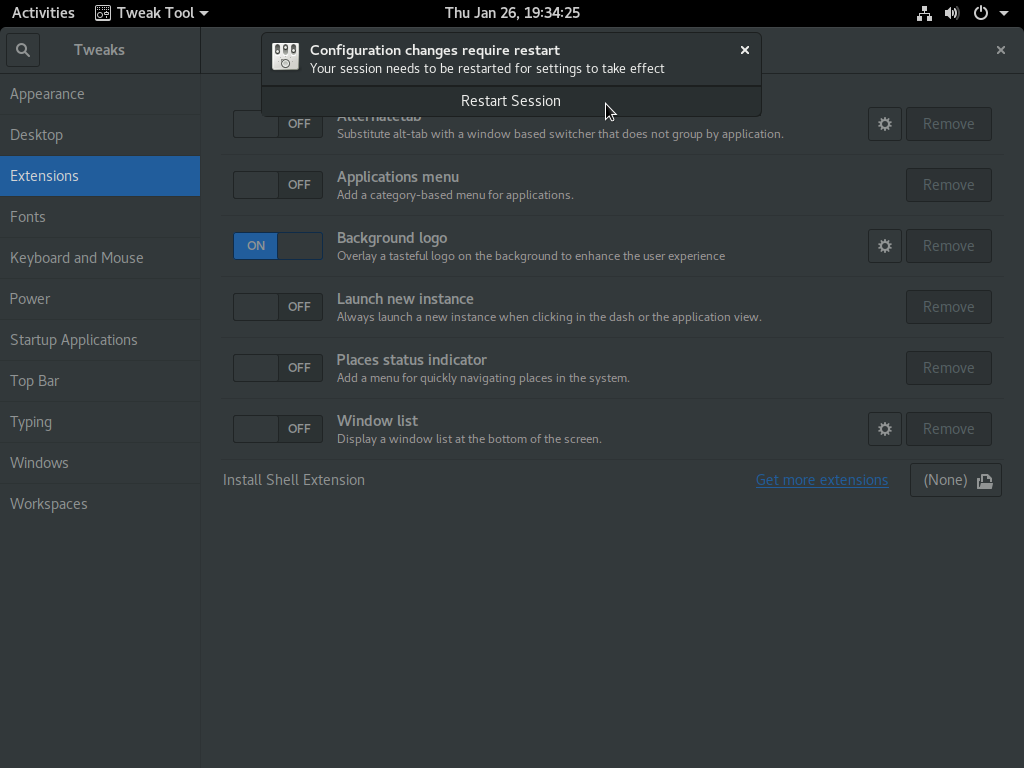
Restart Gnome
You will be asked to restart your gnome session, click on Restart Session. If you accidentally closed this, you can either log out and log back in (not lock the screen, but fully log out), or type alt+F2 at the same time (Mac people: remember you need to add the fn key). A dialog will pop up, type r and hit enter. This just issued a restart request to gnome.
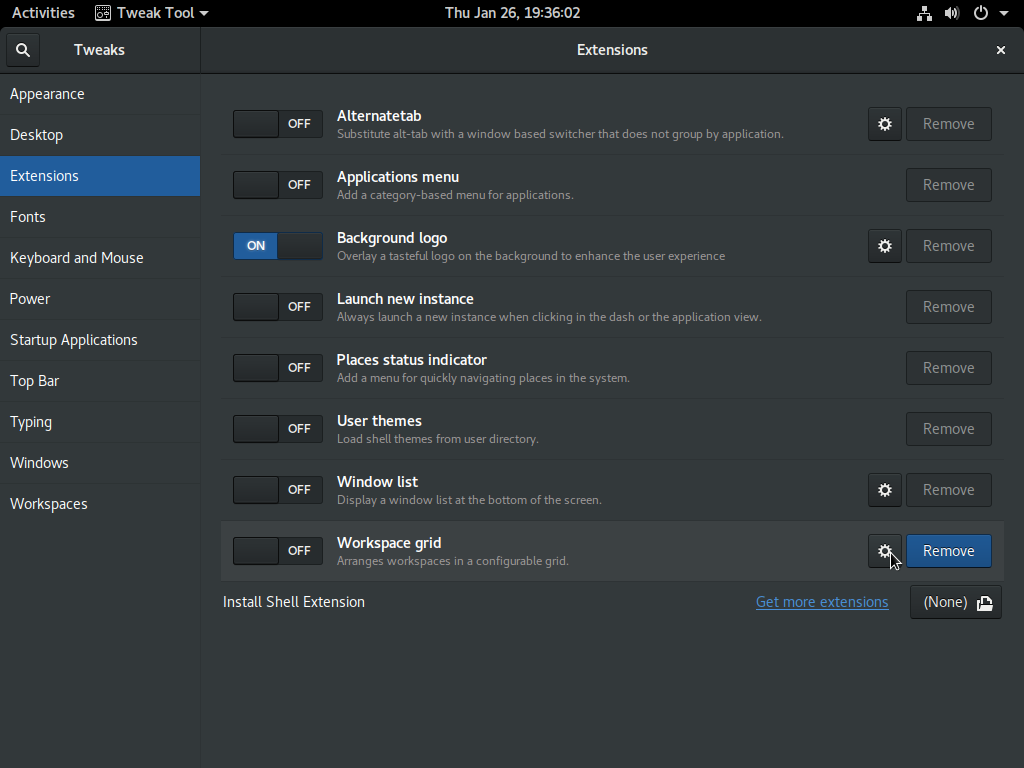
Workspace Grid Installed, Needs Configuration
The installation worked, click on the cog wheel to open up the settings for the Workspace Grid Extension.

Set the Number of Workspaces
Number of rows times the number of columns should equal whatever the number of static workspaces you set in the Workspaces tab of gnome-tweak-tool. The extension will break if you do not. Because I like my workspaces to wrap around, I slide all of them to on.
End Result
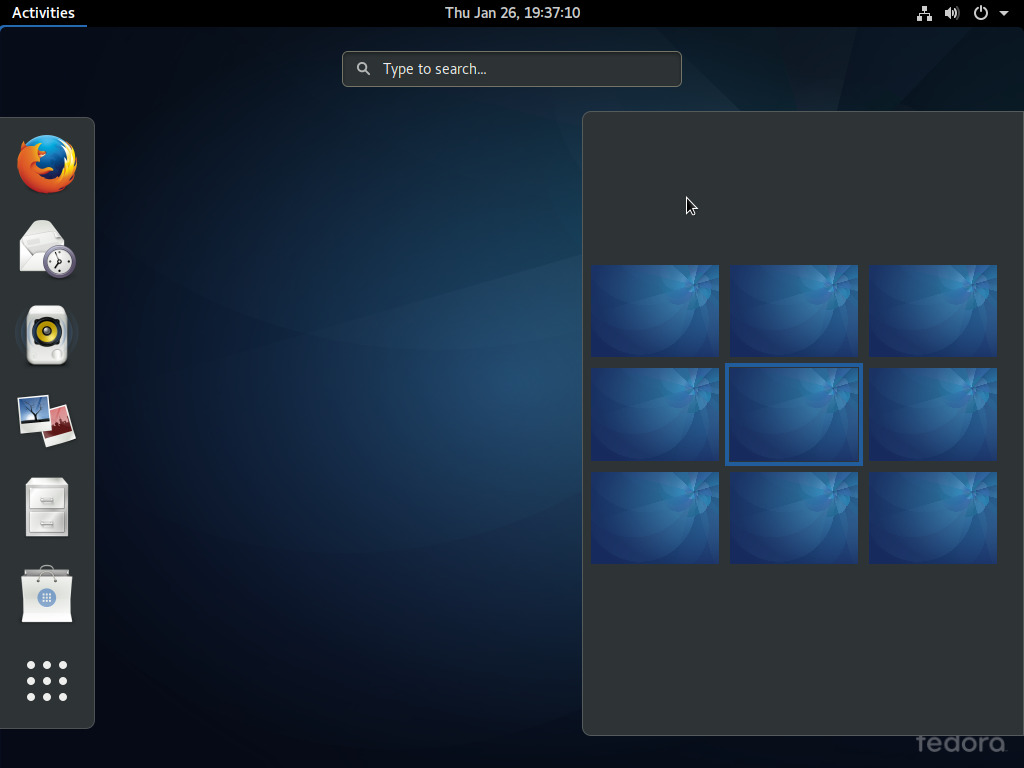
Now that you have the settings configured, in the Extensions tab of gnome-tweak-tool make sure that you have slid Workspace Grid to be on. Now hit the super key to get into the overview.
Install unity-tweak-tool and compizconfig-settings-manager
# install unity-tweak-tool
$ sudo apt-get install unity-tweak-tool
# install compizconfig-settings-manager
$ sudo apt-get install compizconfig-settings-manager
Setup Workspaces and More
At this point in time, while unity-tweak-tool is great for changing many aspects such
as the cursor color or mouse behavior, we will ignore its claimed capabilities to
configure the workspaces since it generally does not work. For the workspaces, we will
use the CompizConfig Settings Manager.
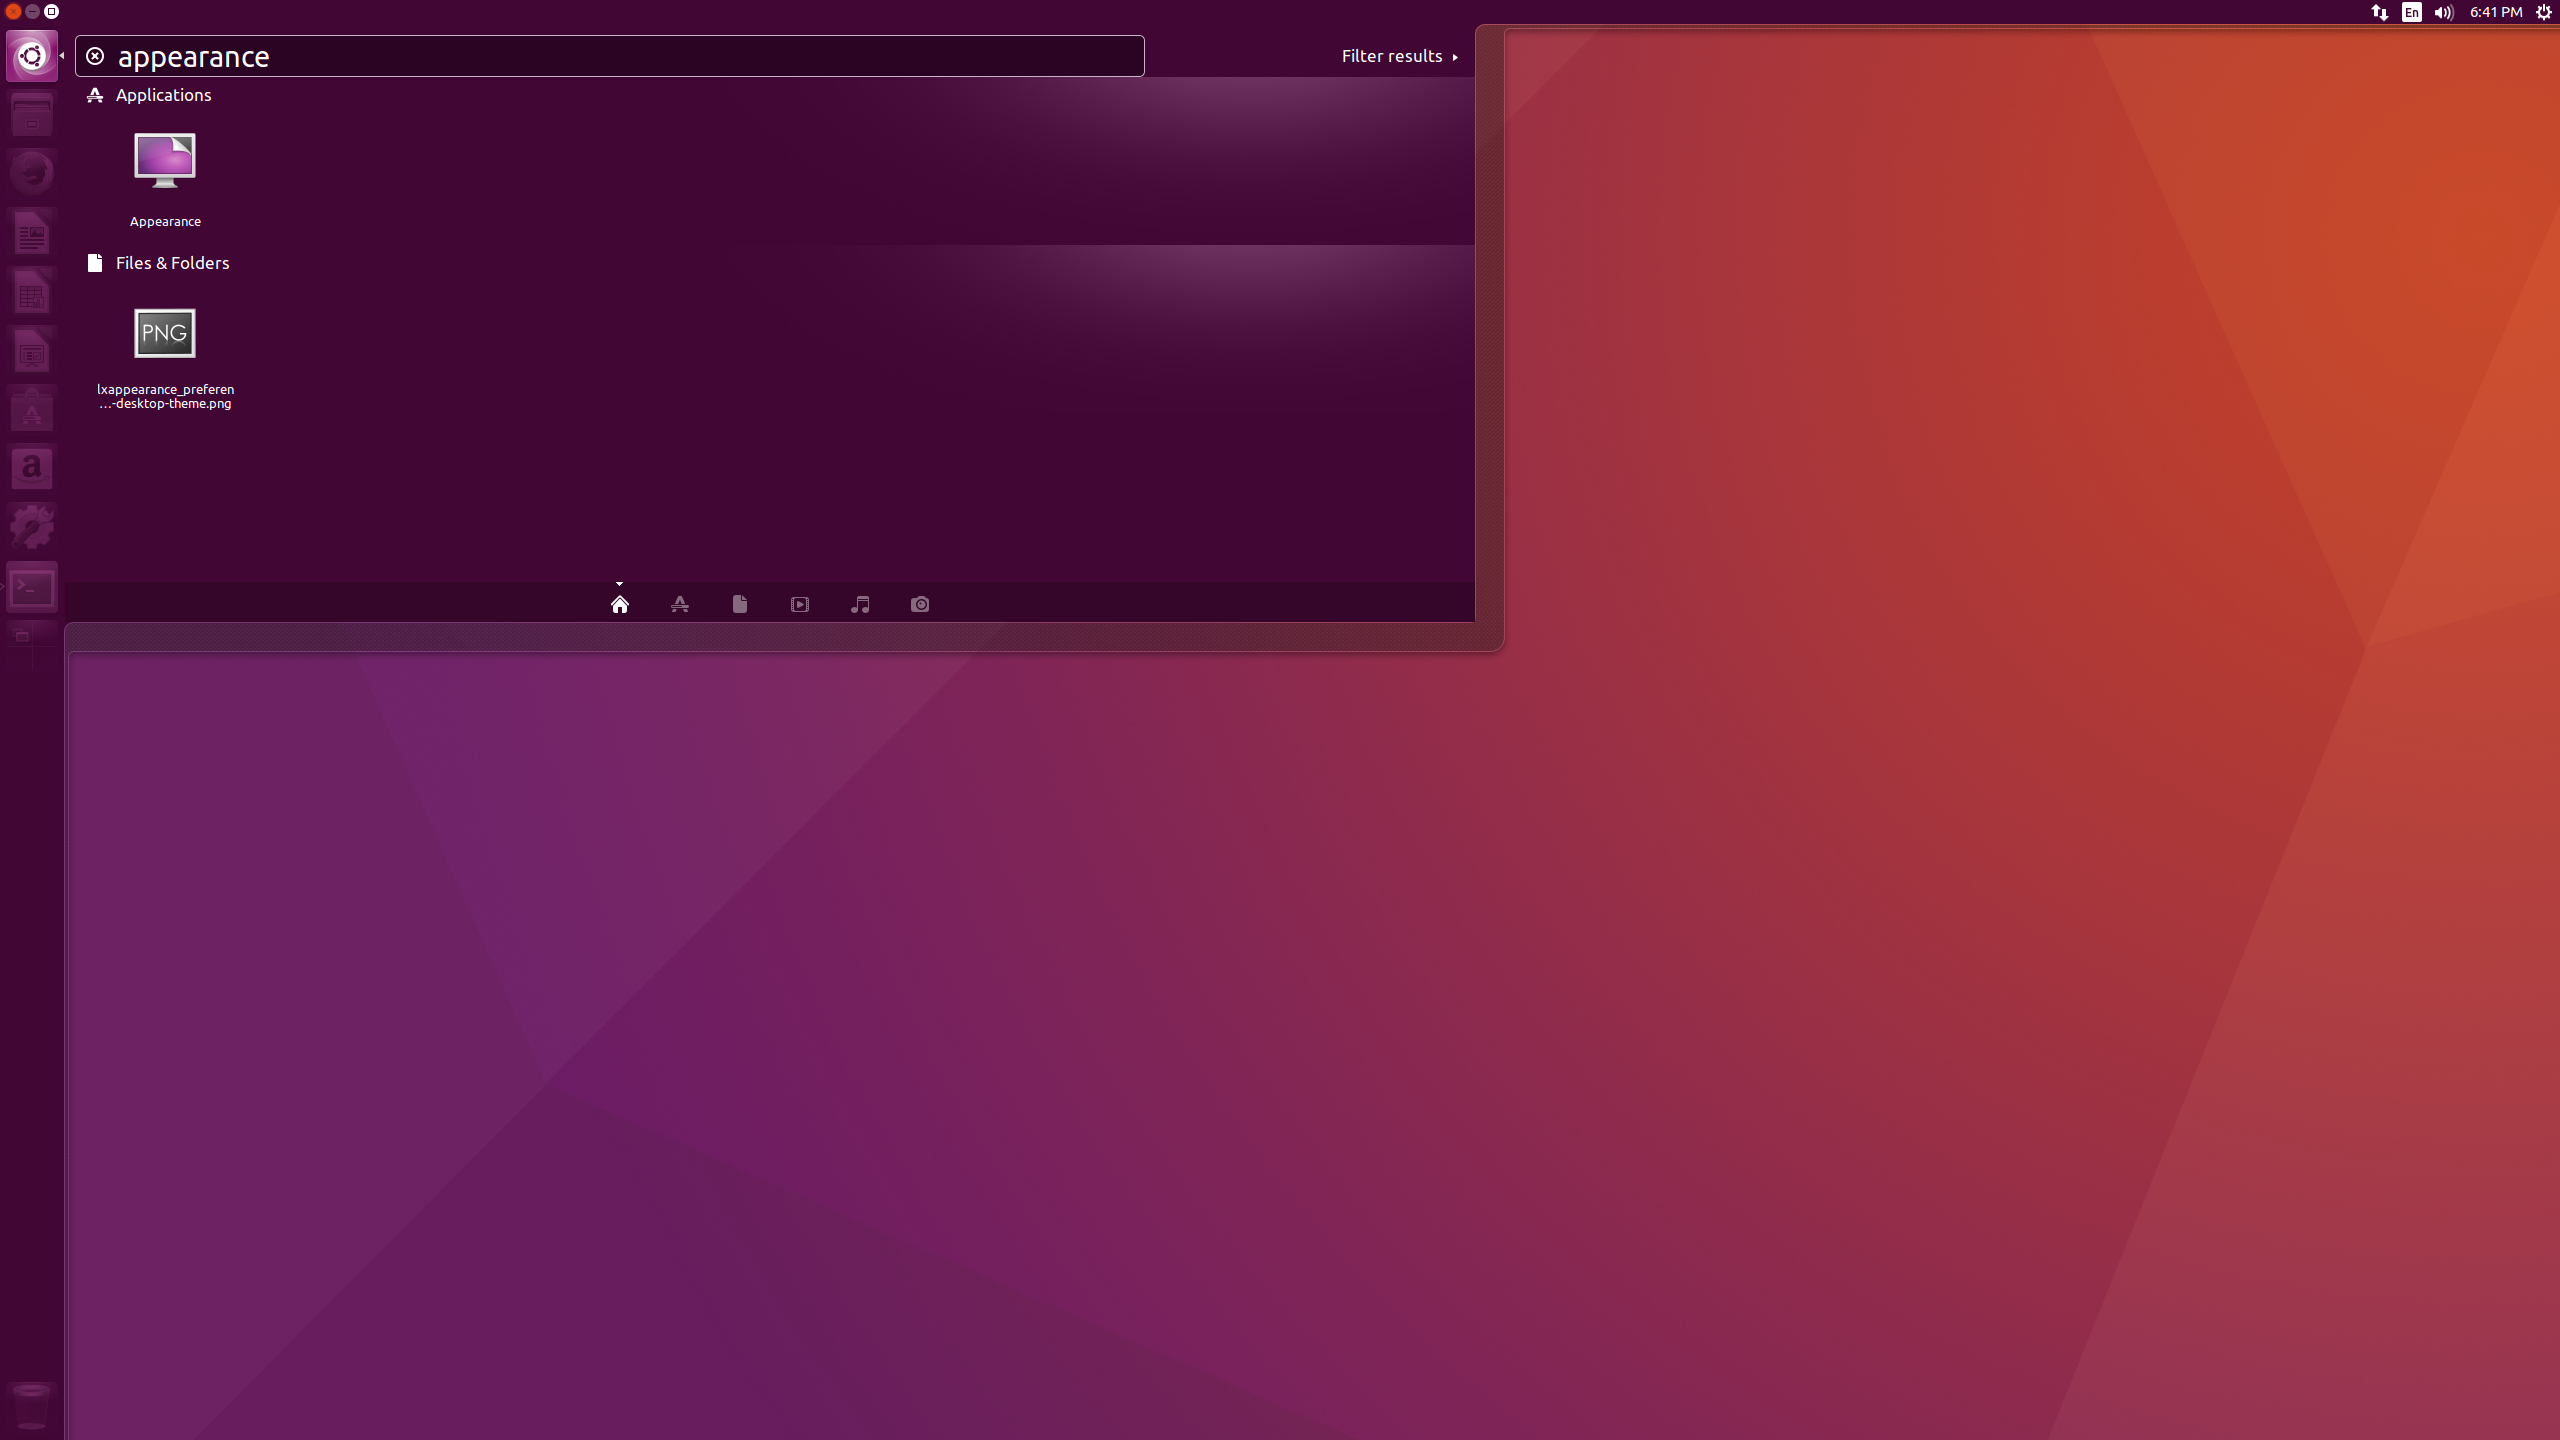
Launch the Appearance Settings
Either click on the Unity icon in the top left or hit the super (command on mac, windows button otherwise) and type appearance. Use the down arrow to select the system Appearance and hit enter.
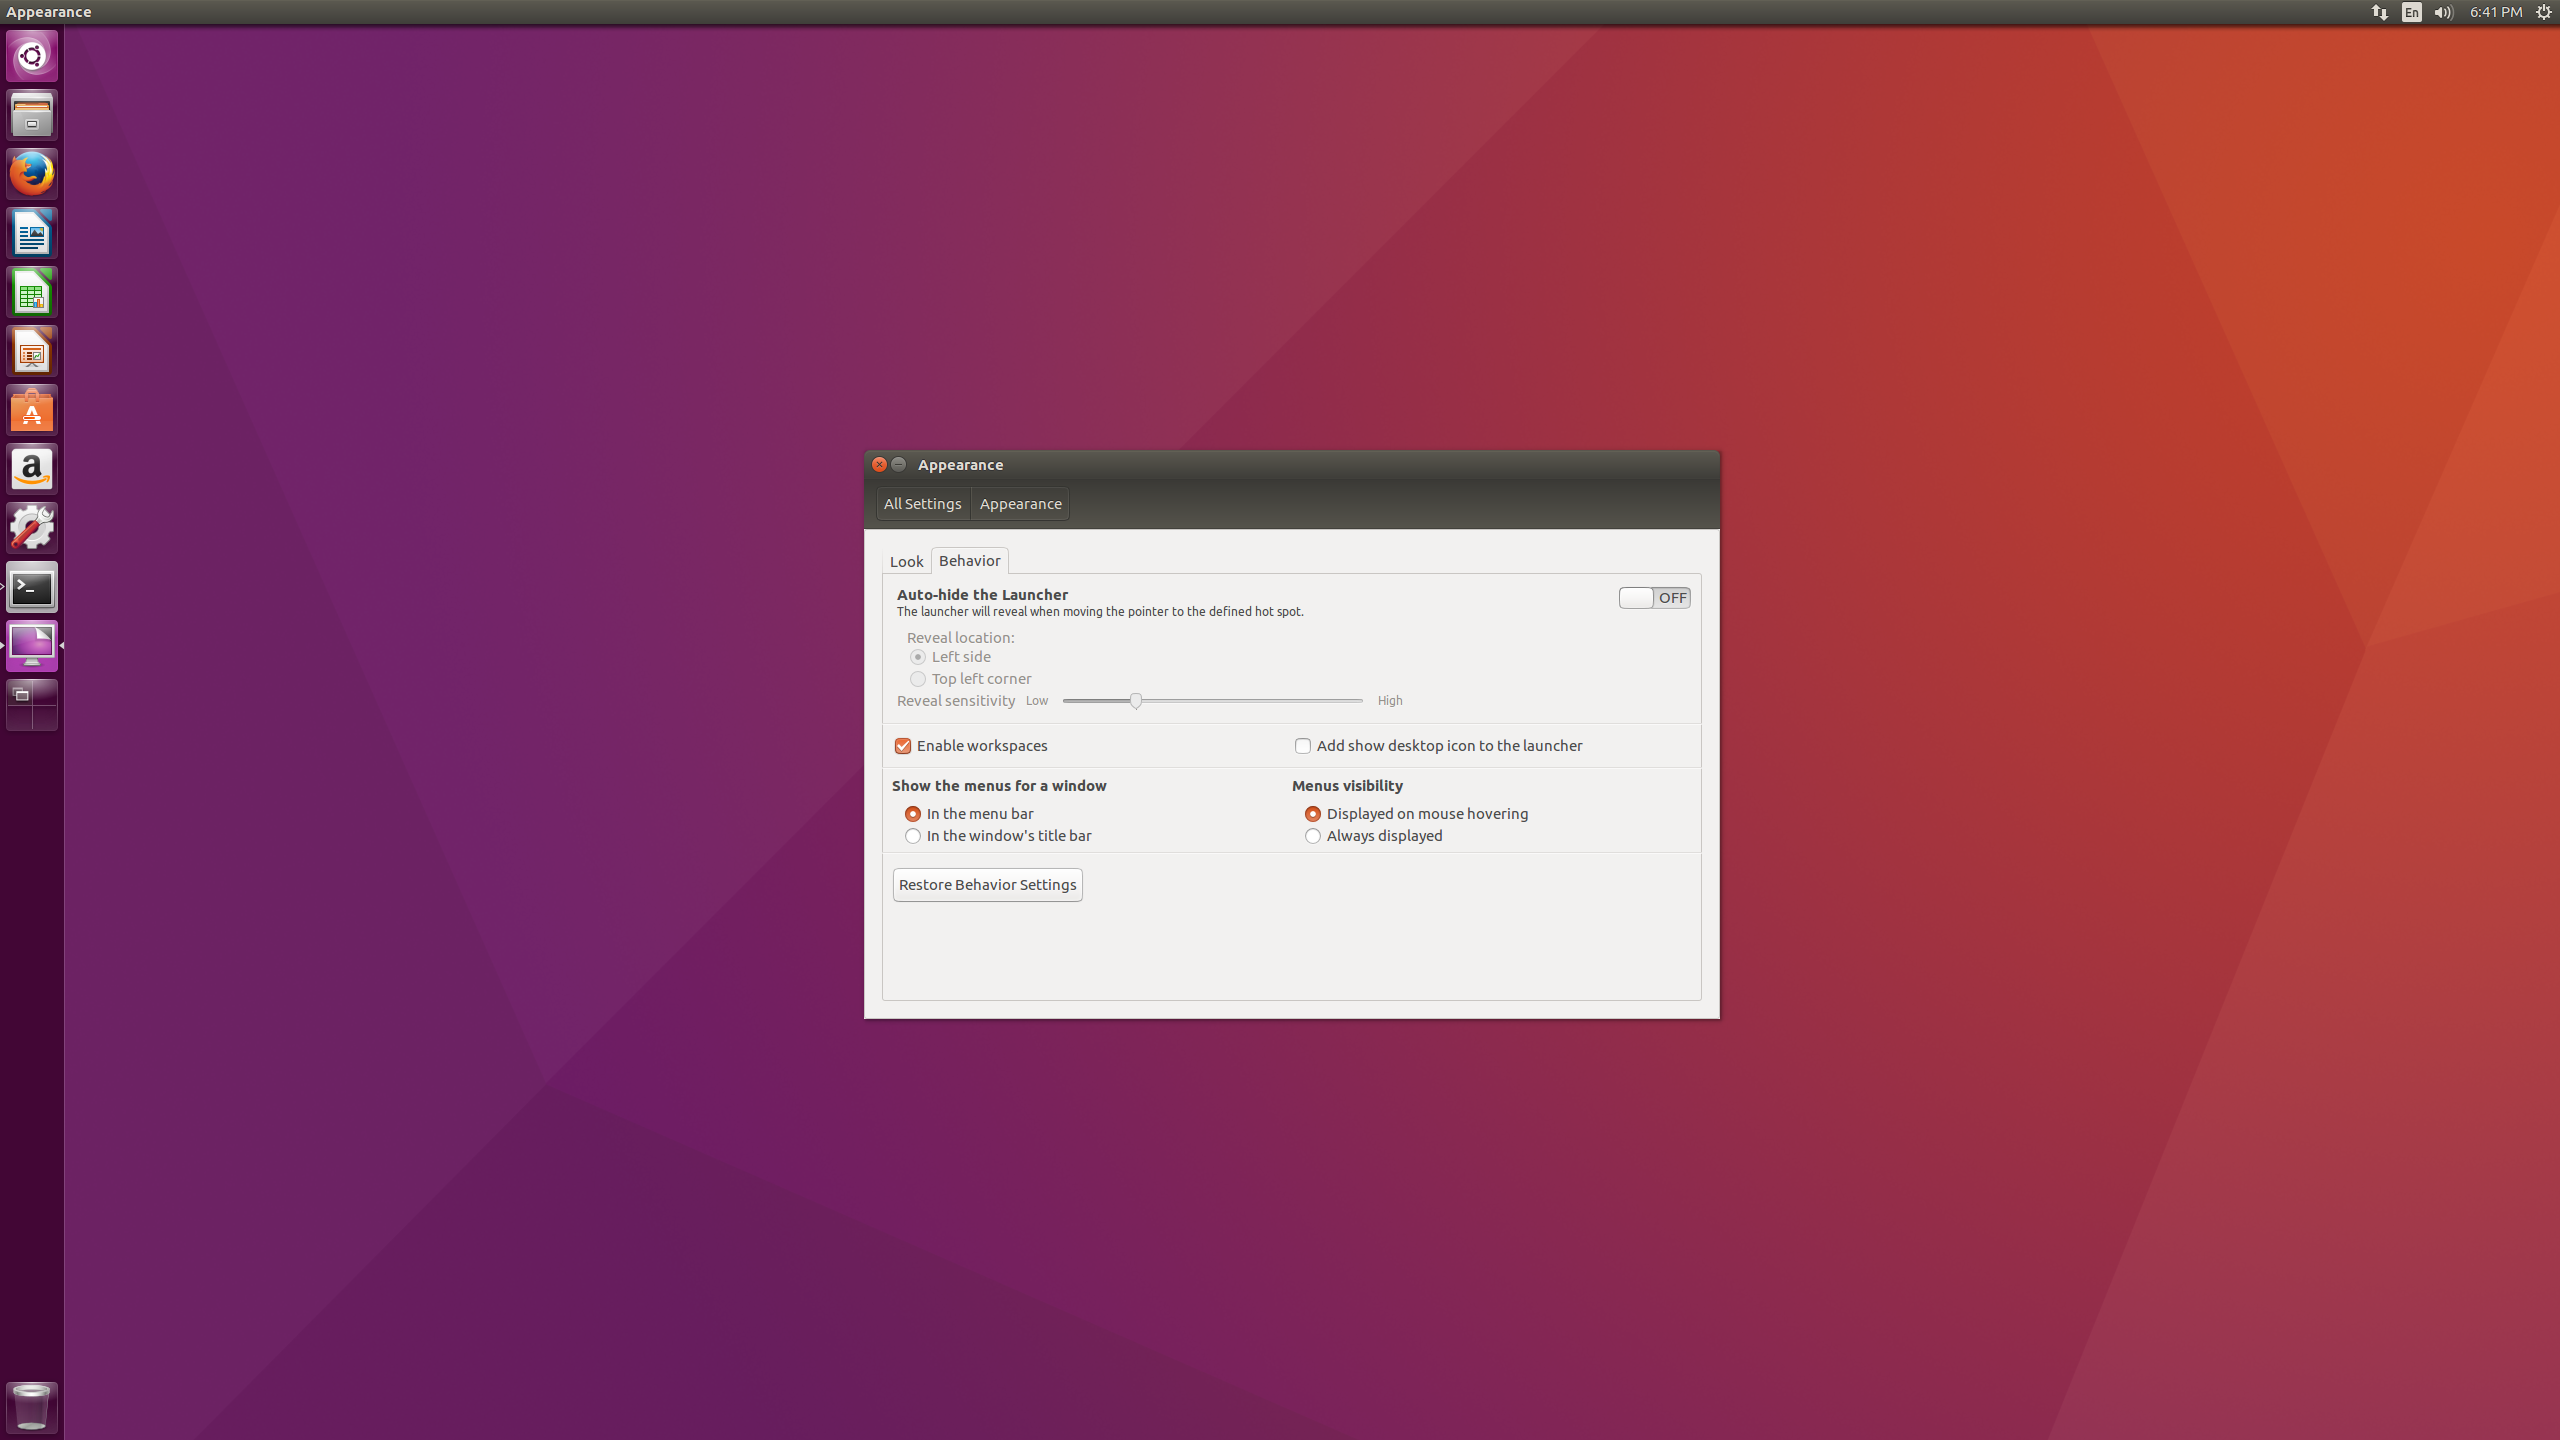
Enable Workspaces
Select the Behavior tab and make sure the Enable workspaces box is checked.
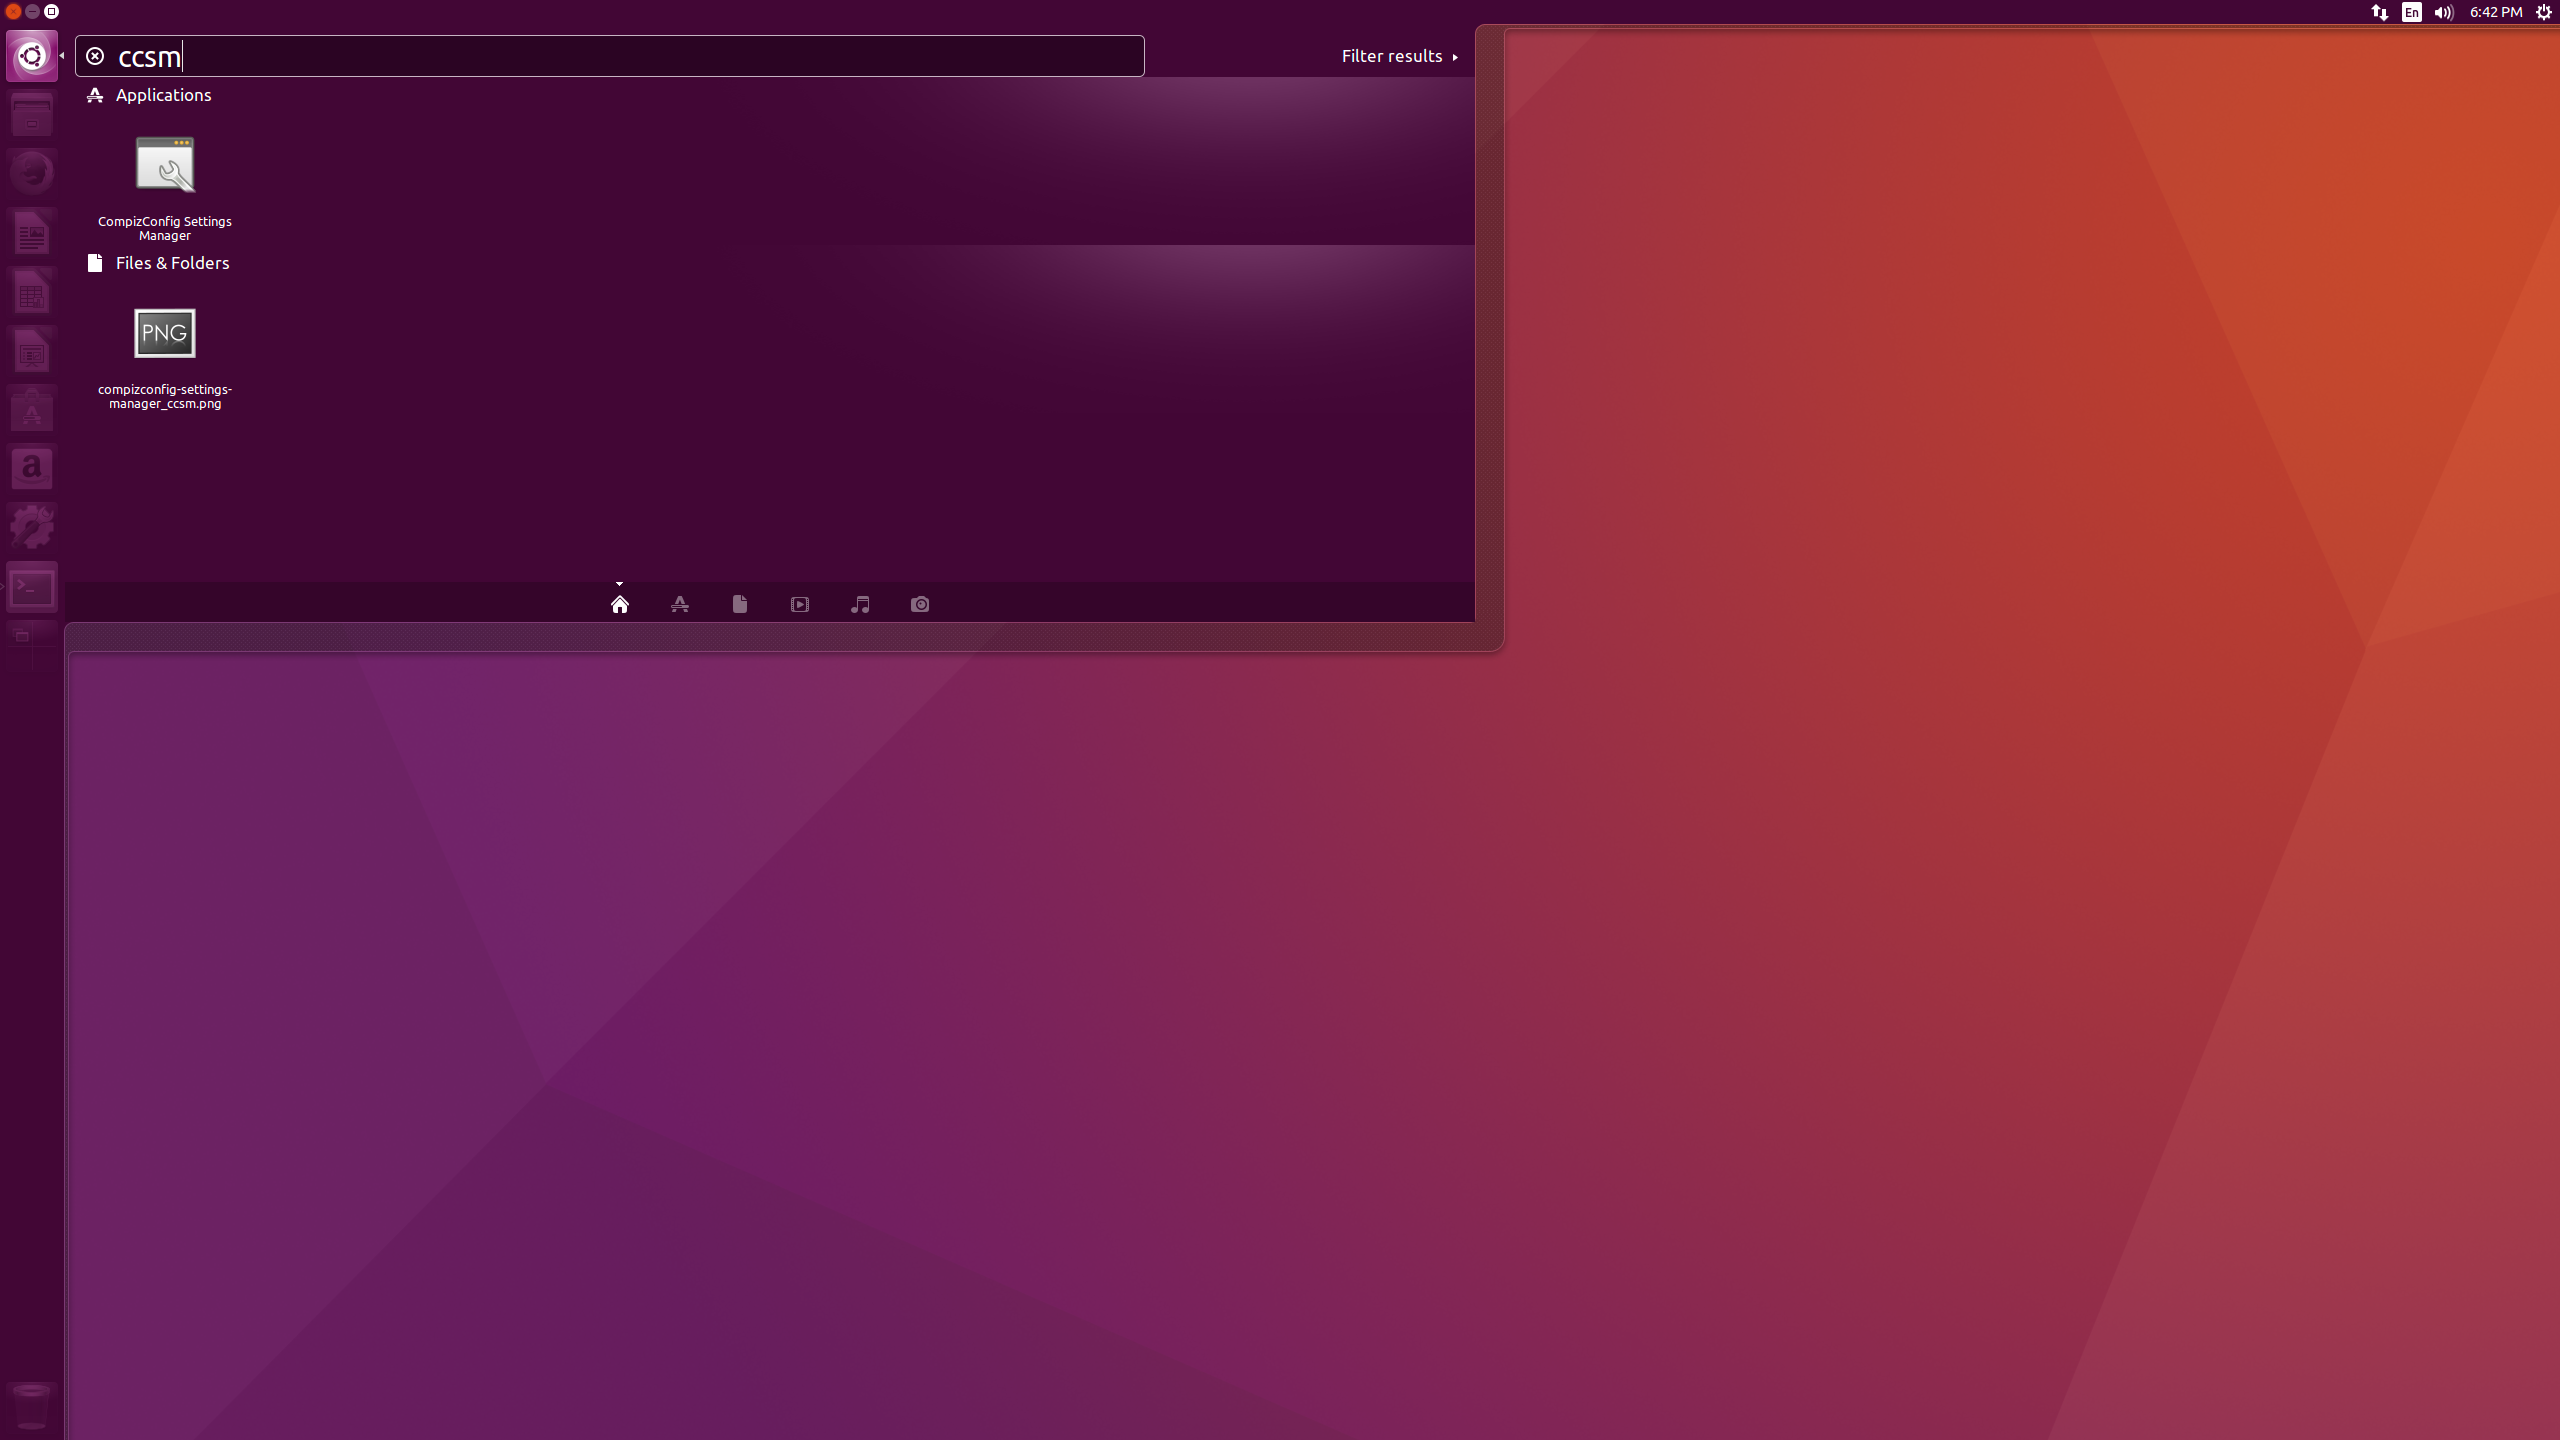
Launch the CompizConfig Settings Manager (CCSM)
Using the launcher, type ccsm, arrow to CompizConfig Settings Manager and hit enter.
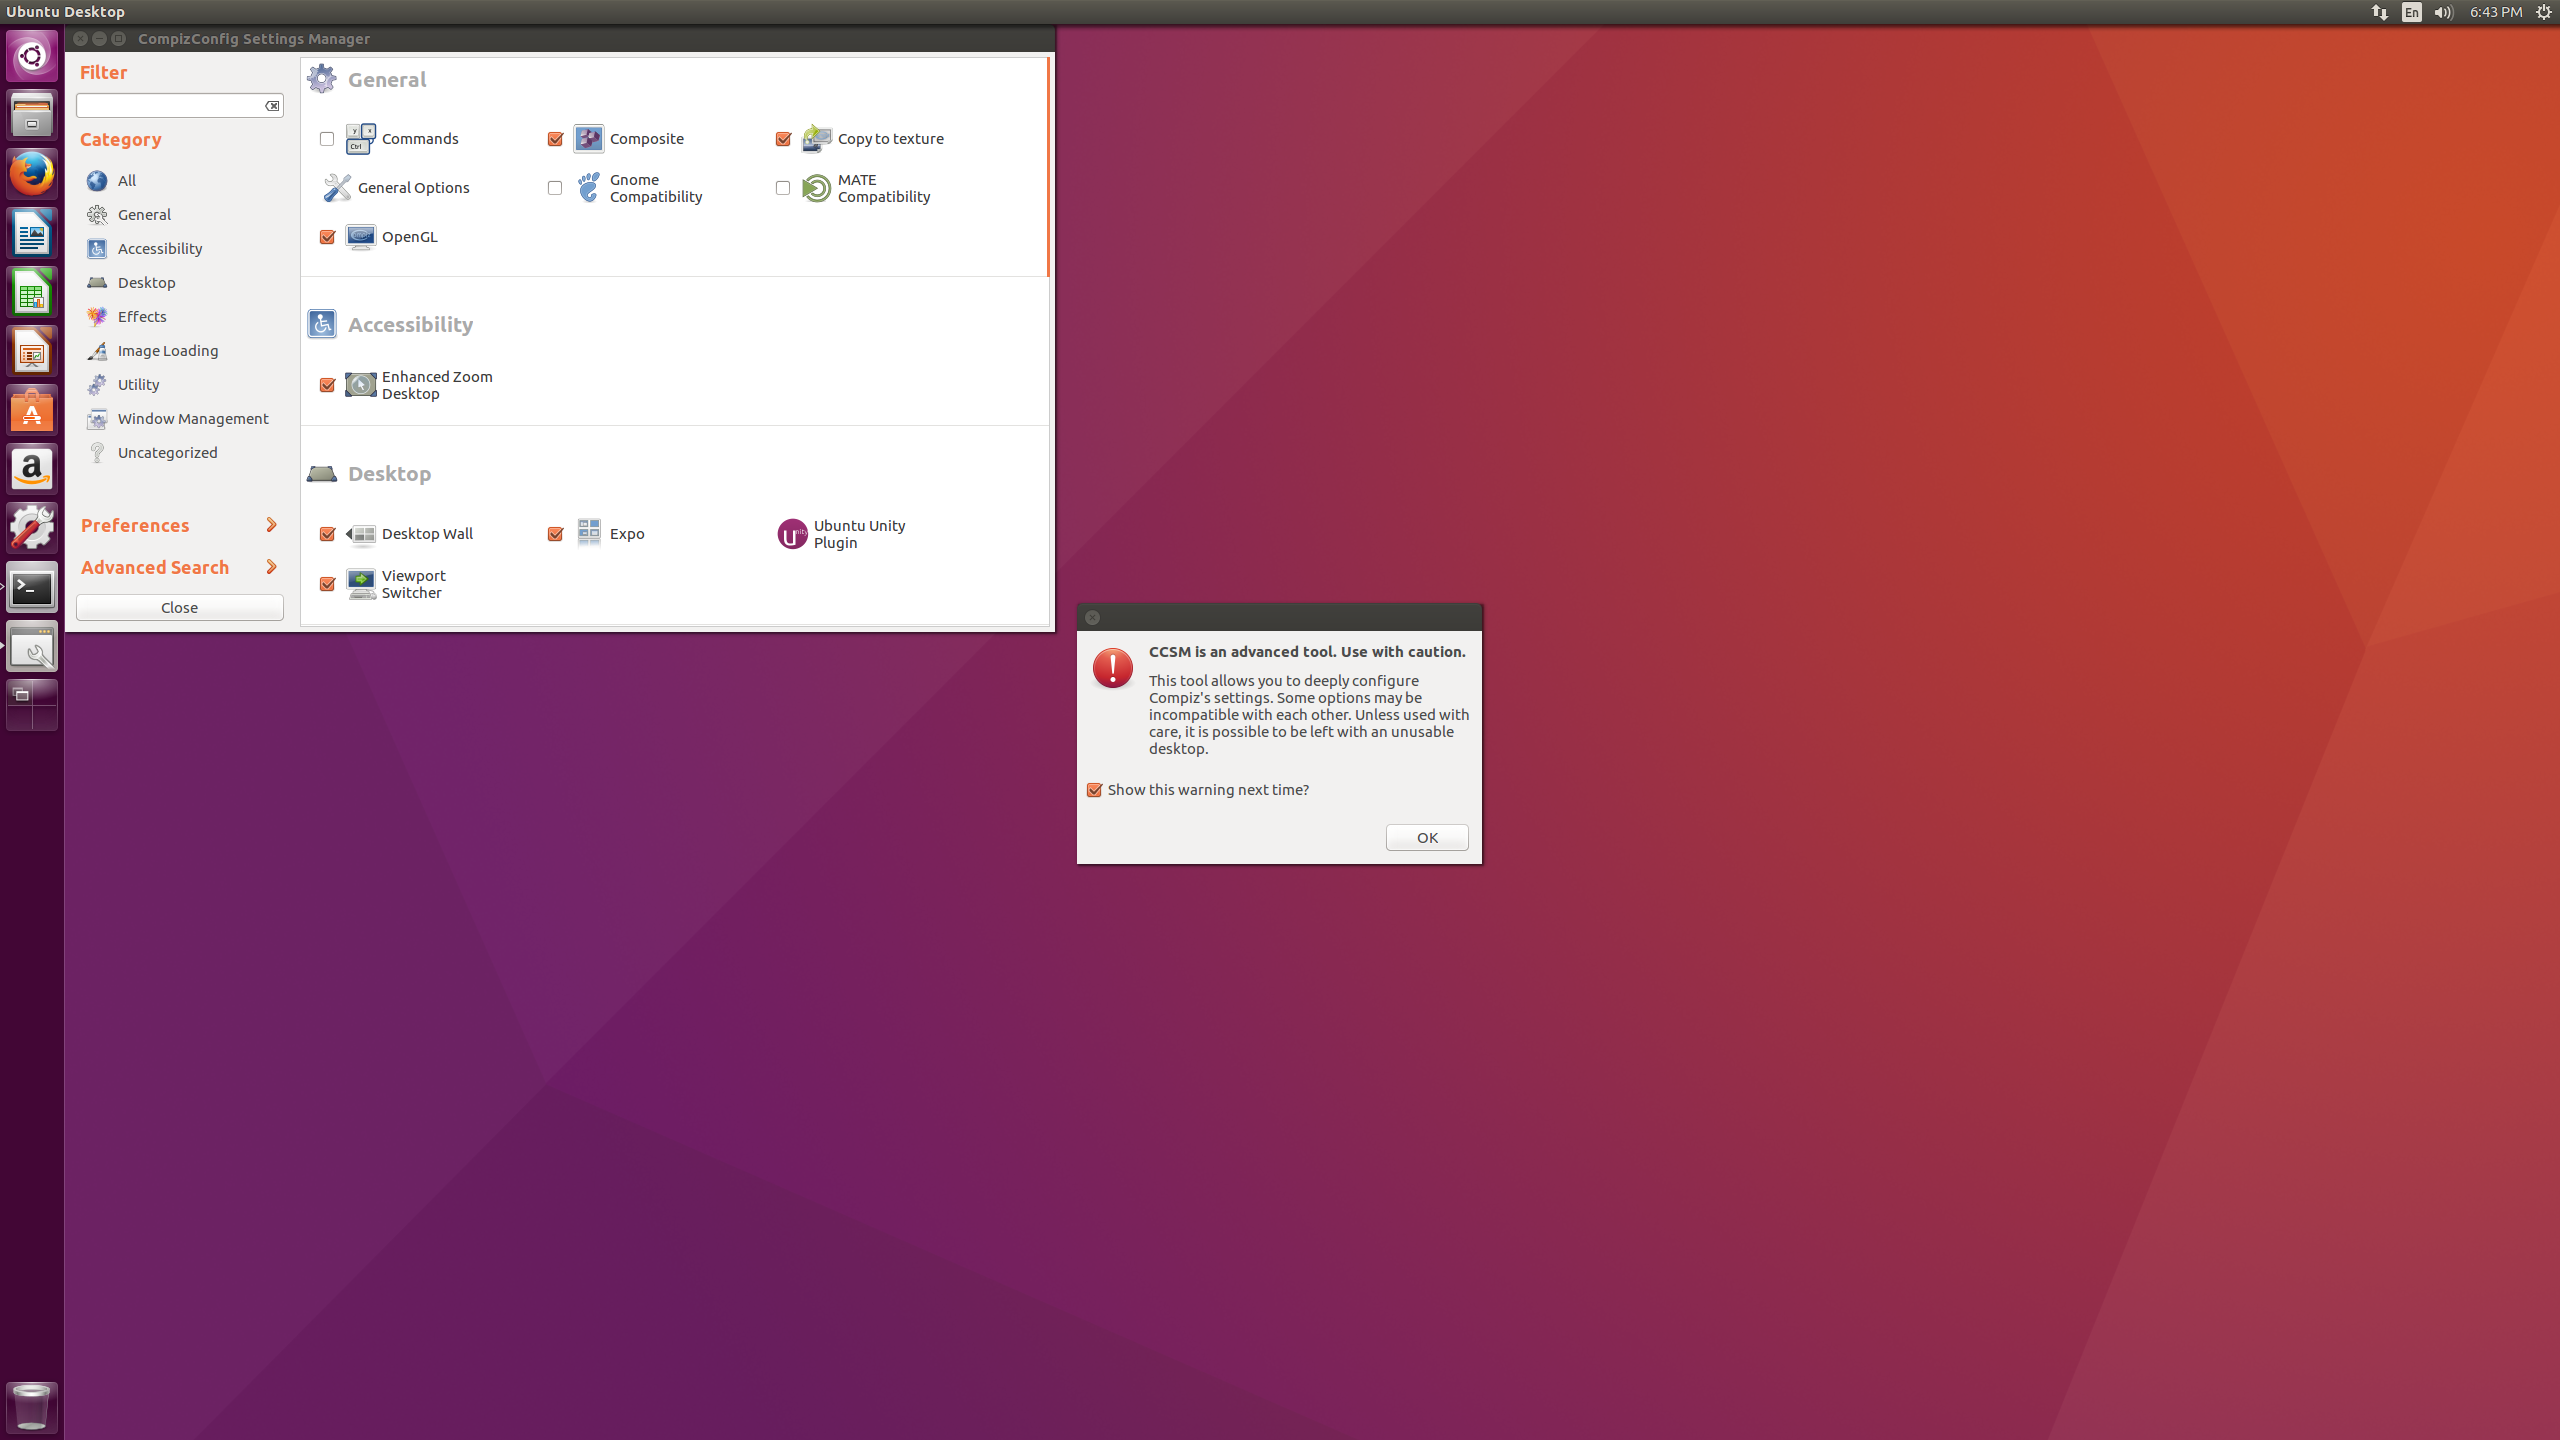
CCSM Warning
By default this program always warns you of its dangers. You are encouraged to leave that checked – it will force you to be careful.
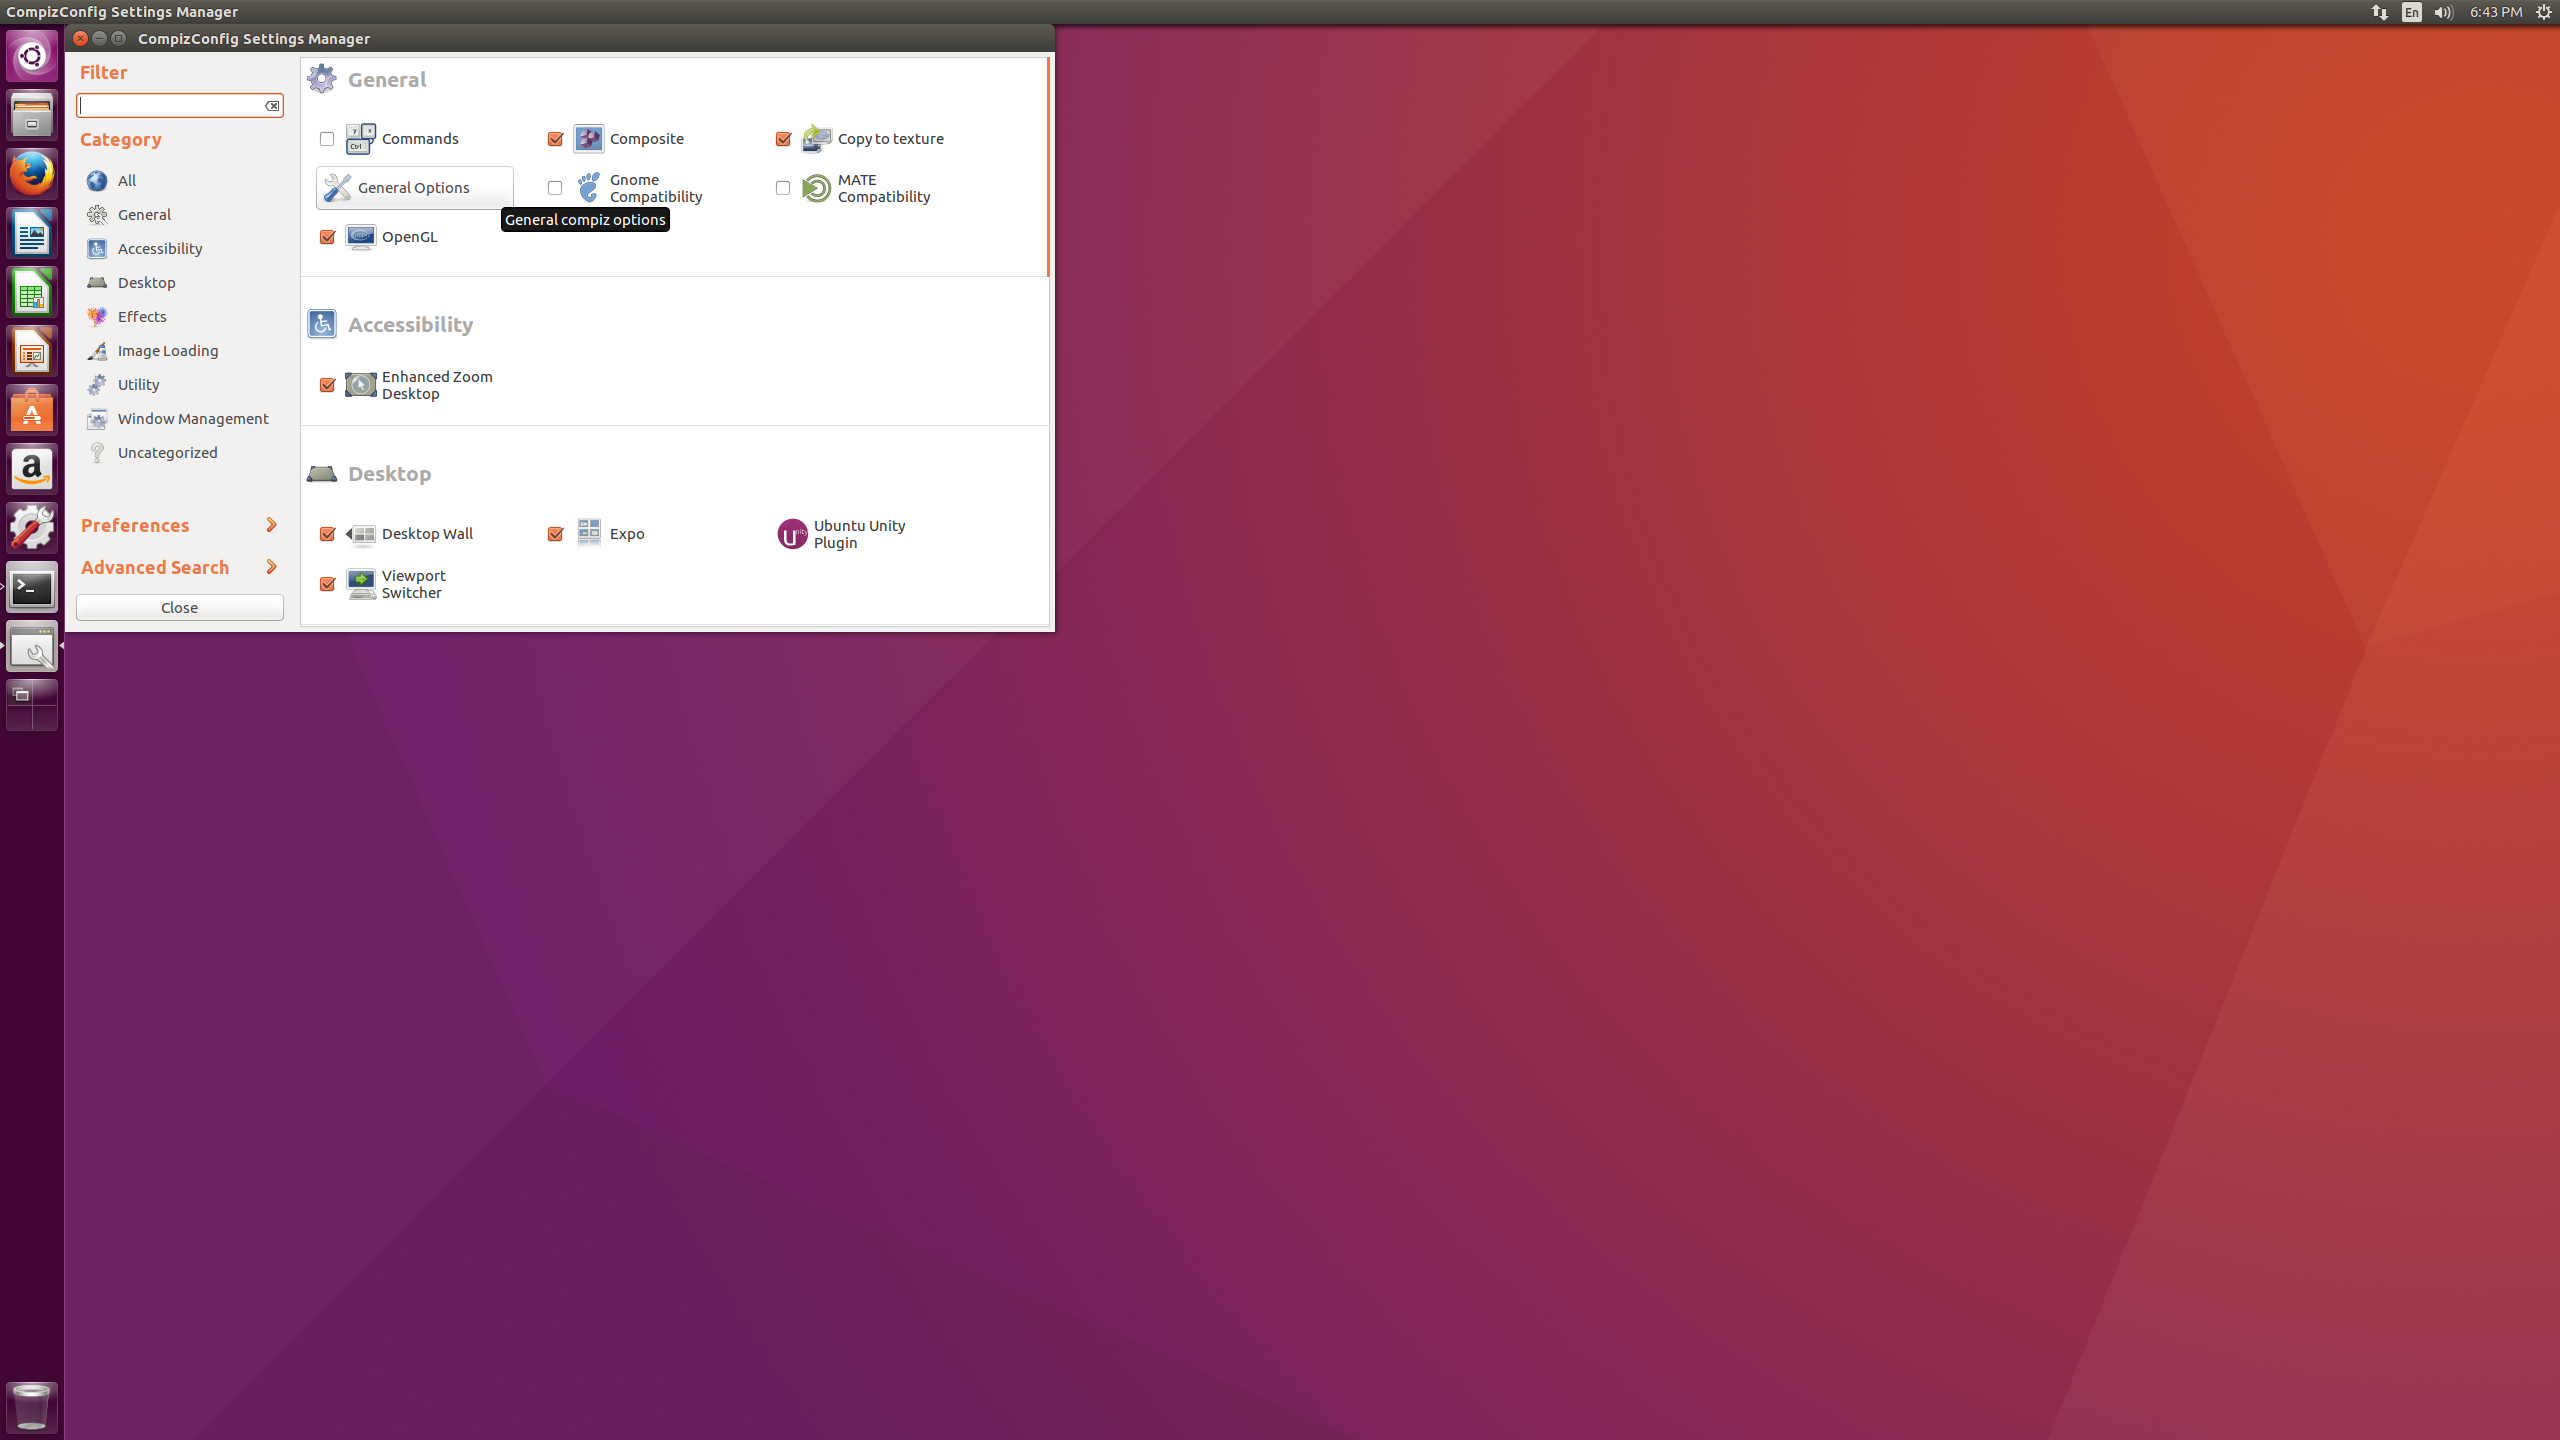
General Options
Select the General Options menu.
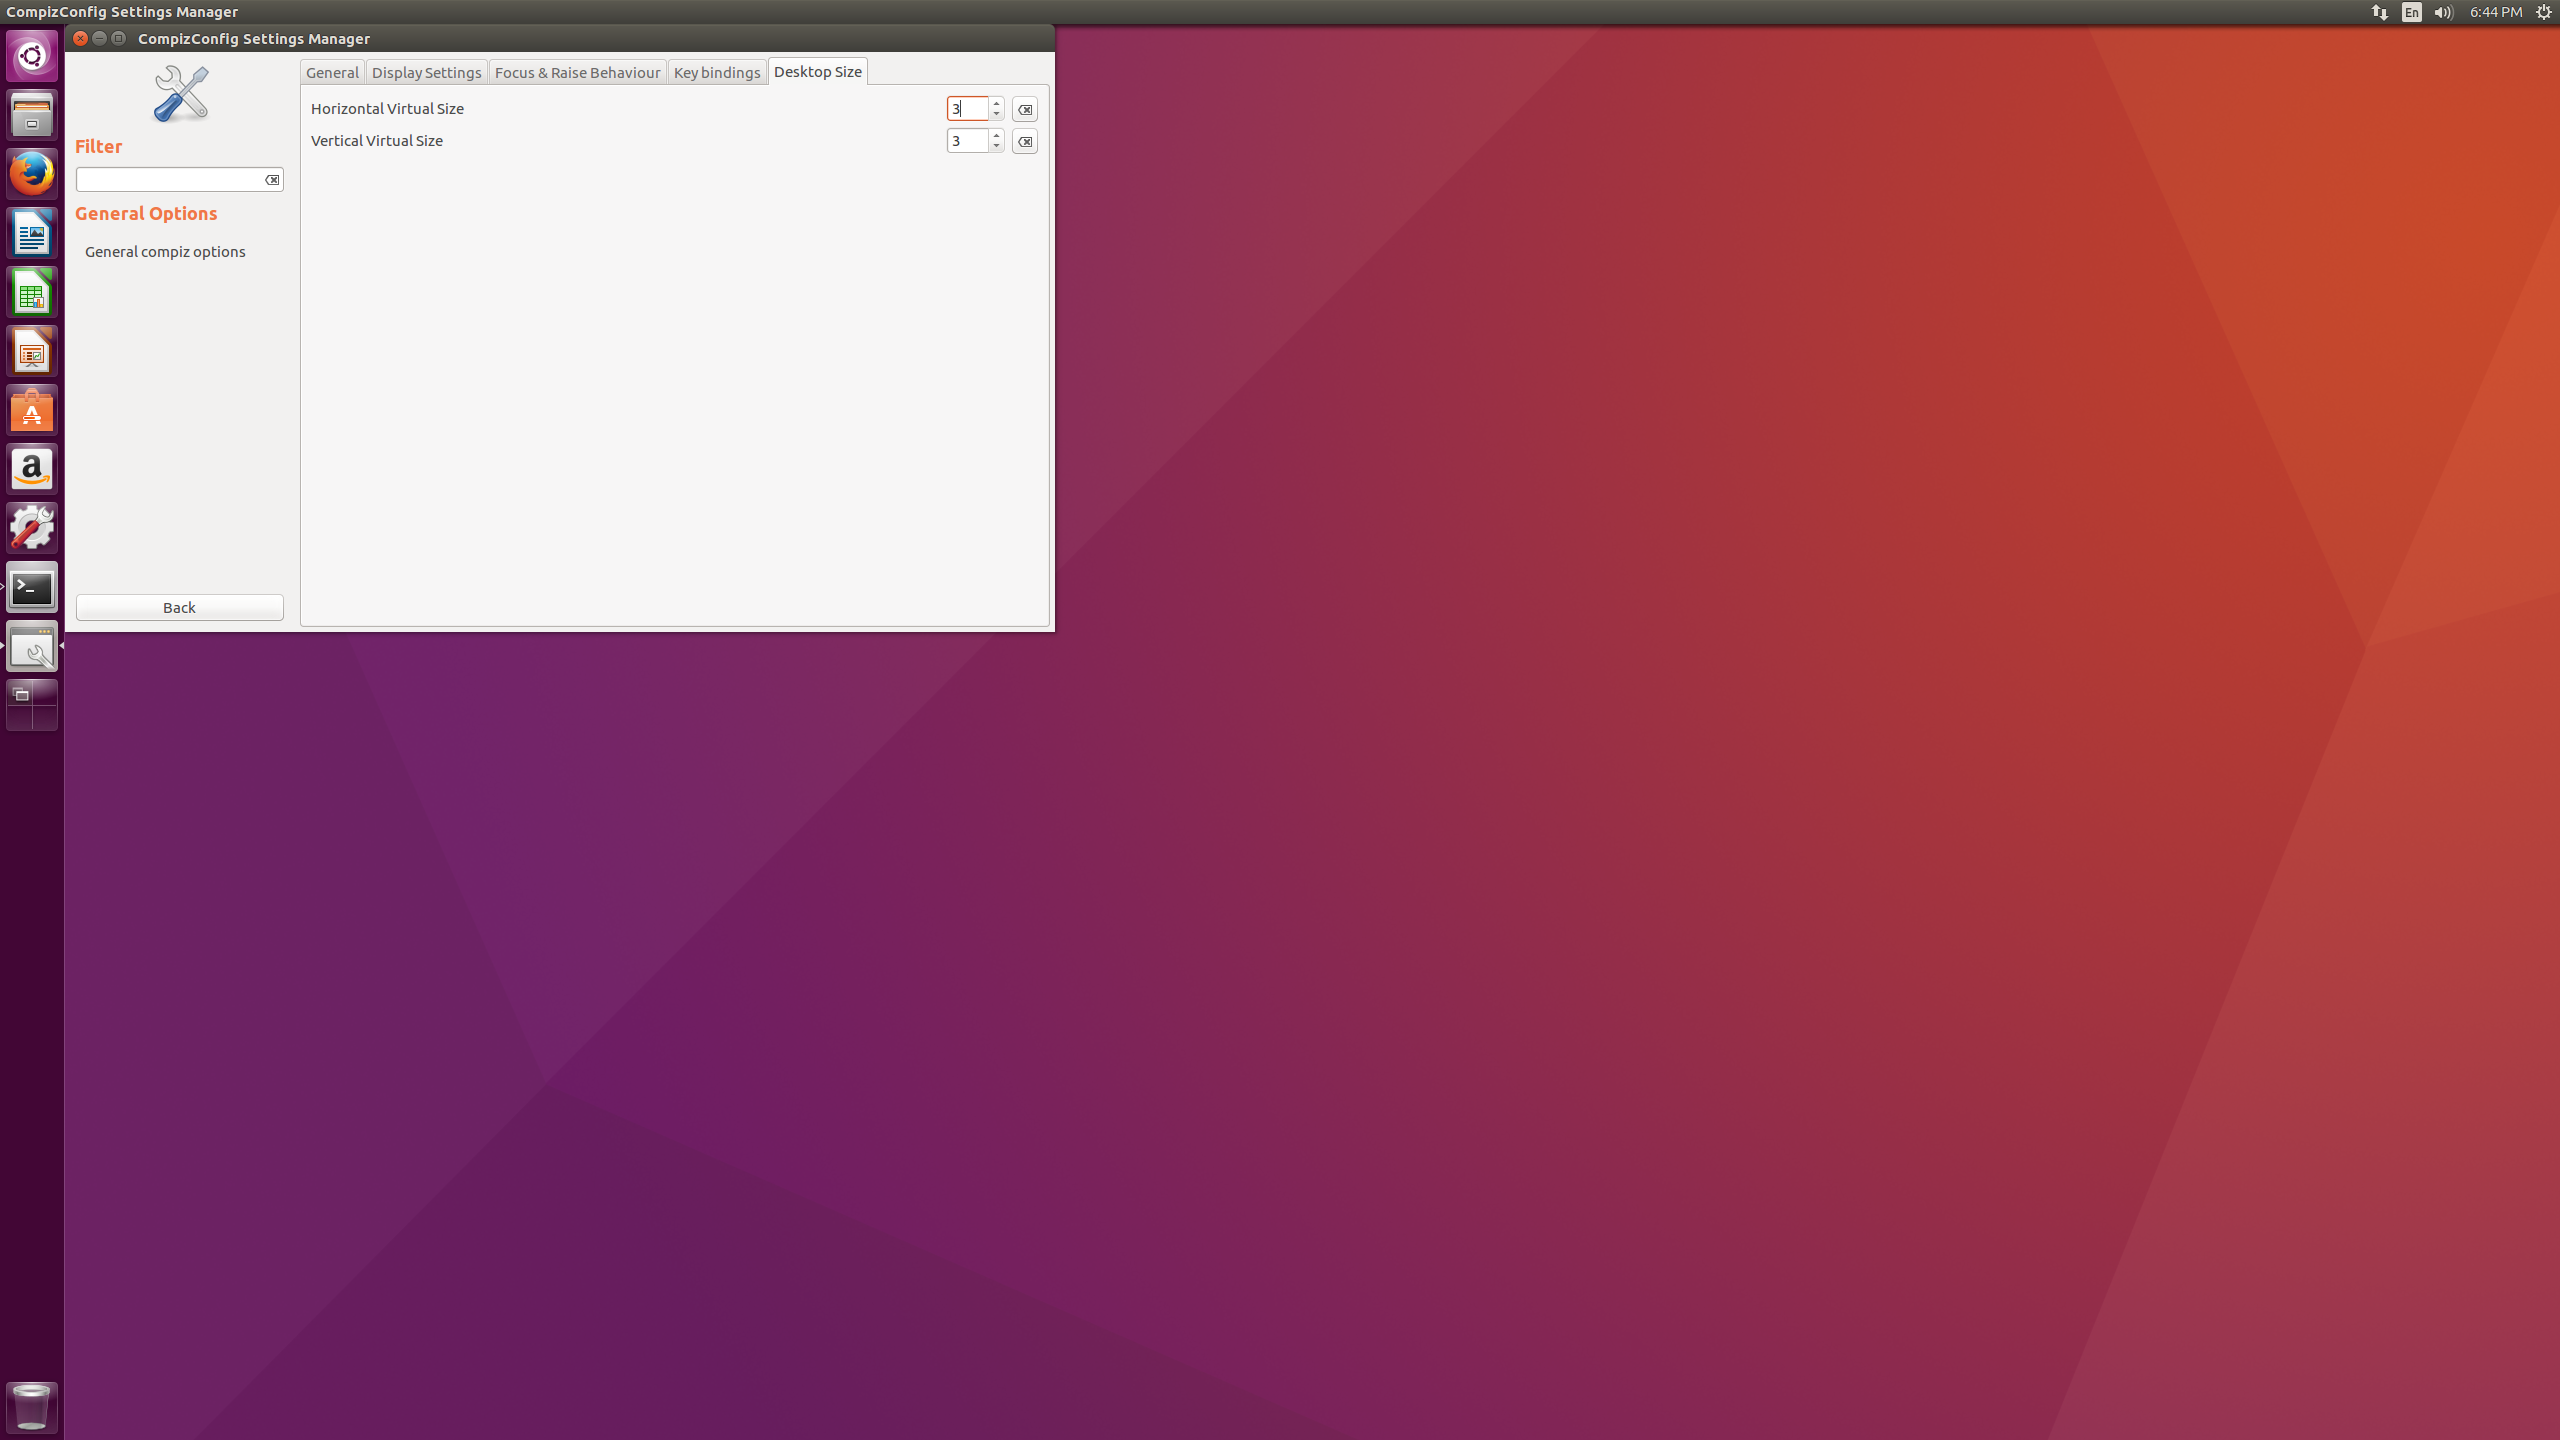
Set the Number of Workspaces
Since I am showing you a 3x3 grid, this is what is entered. You can configure this however you see fit! When finished, hit the Back button in the bottom left to return to the previous menu.
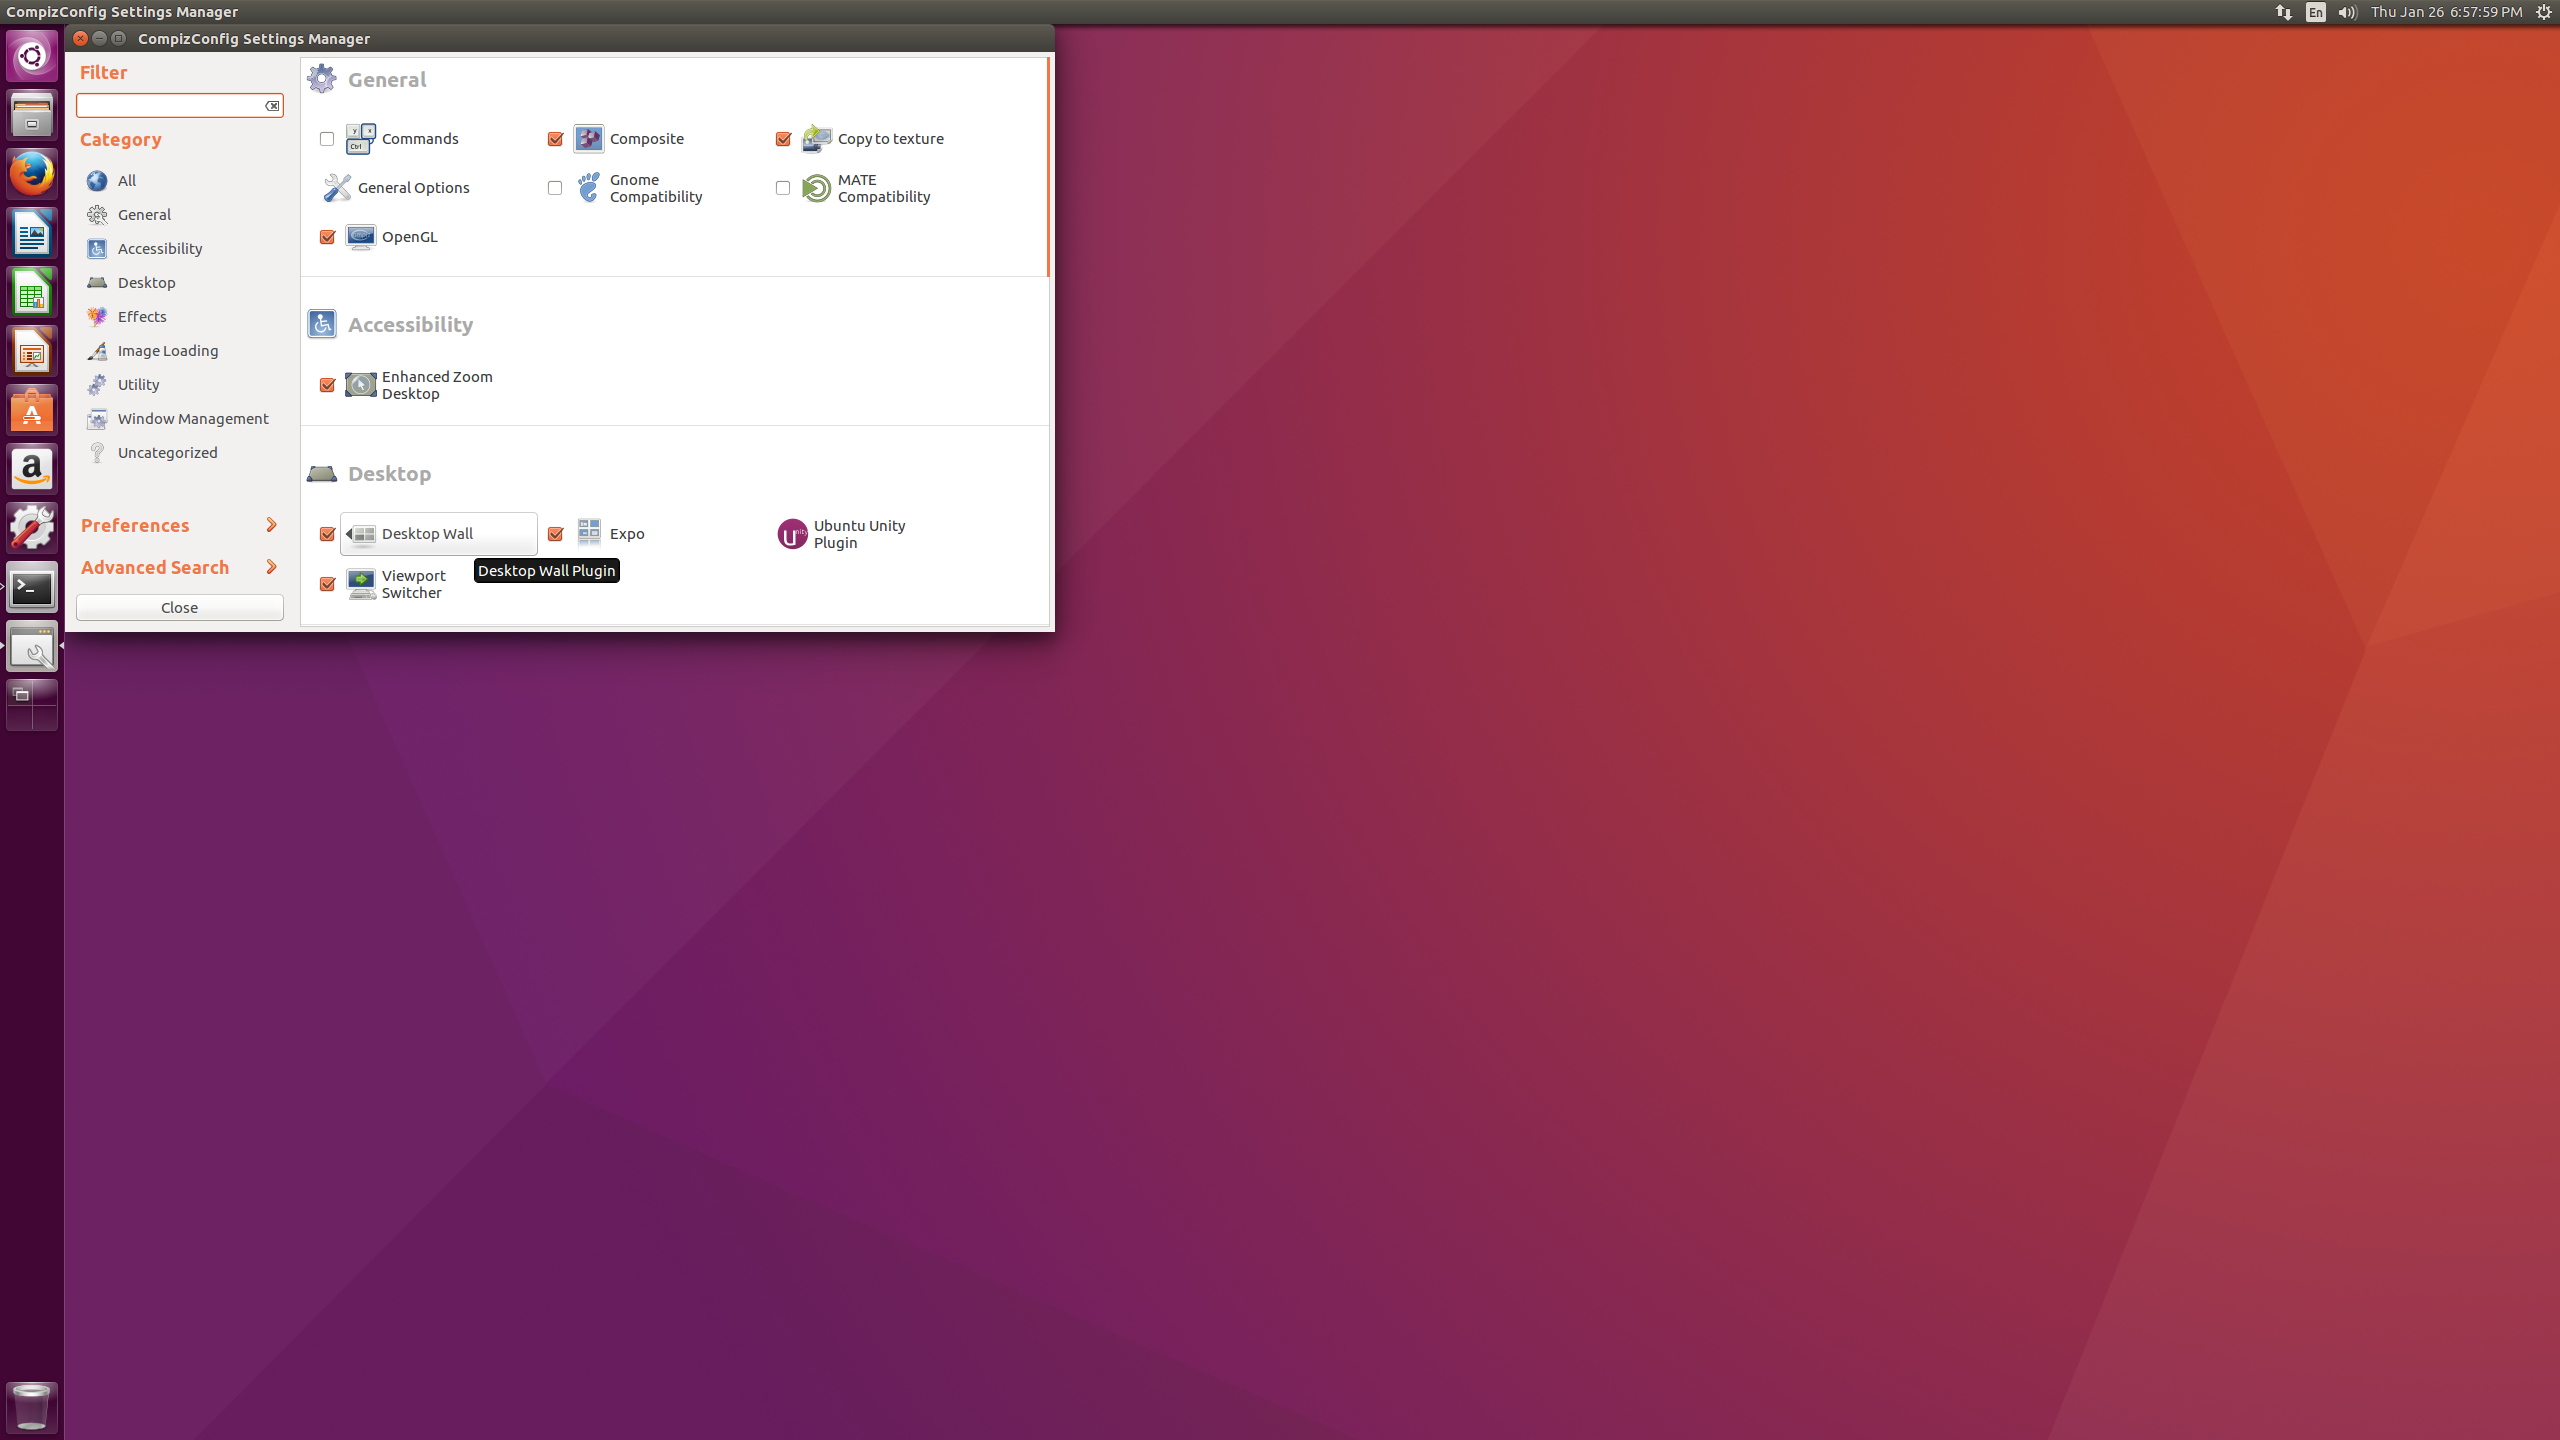
Desktop Wall
Select the Desktop Wall button, making sure that the box next to it is checked (sometimes it isn’t).
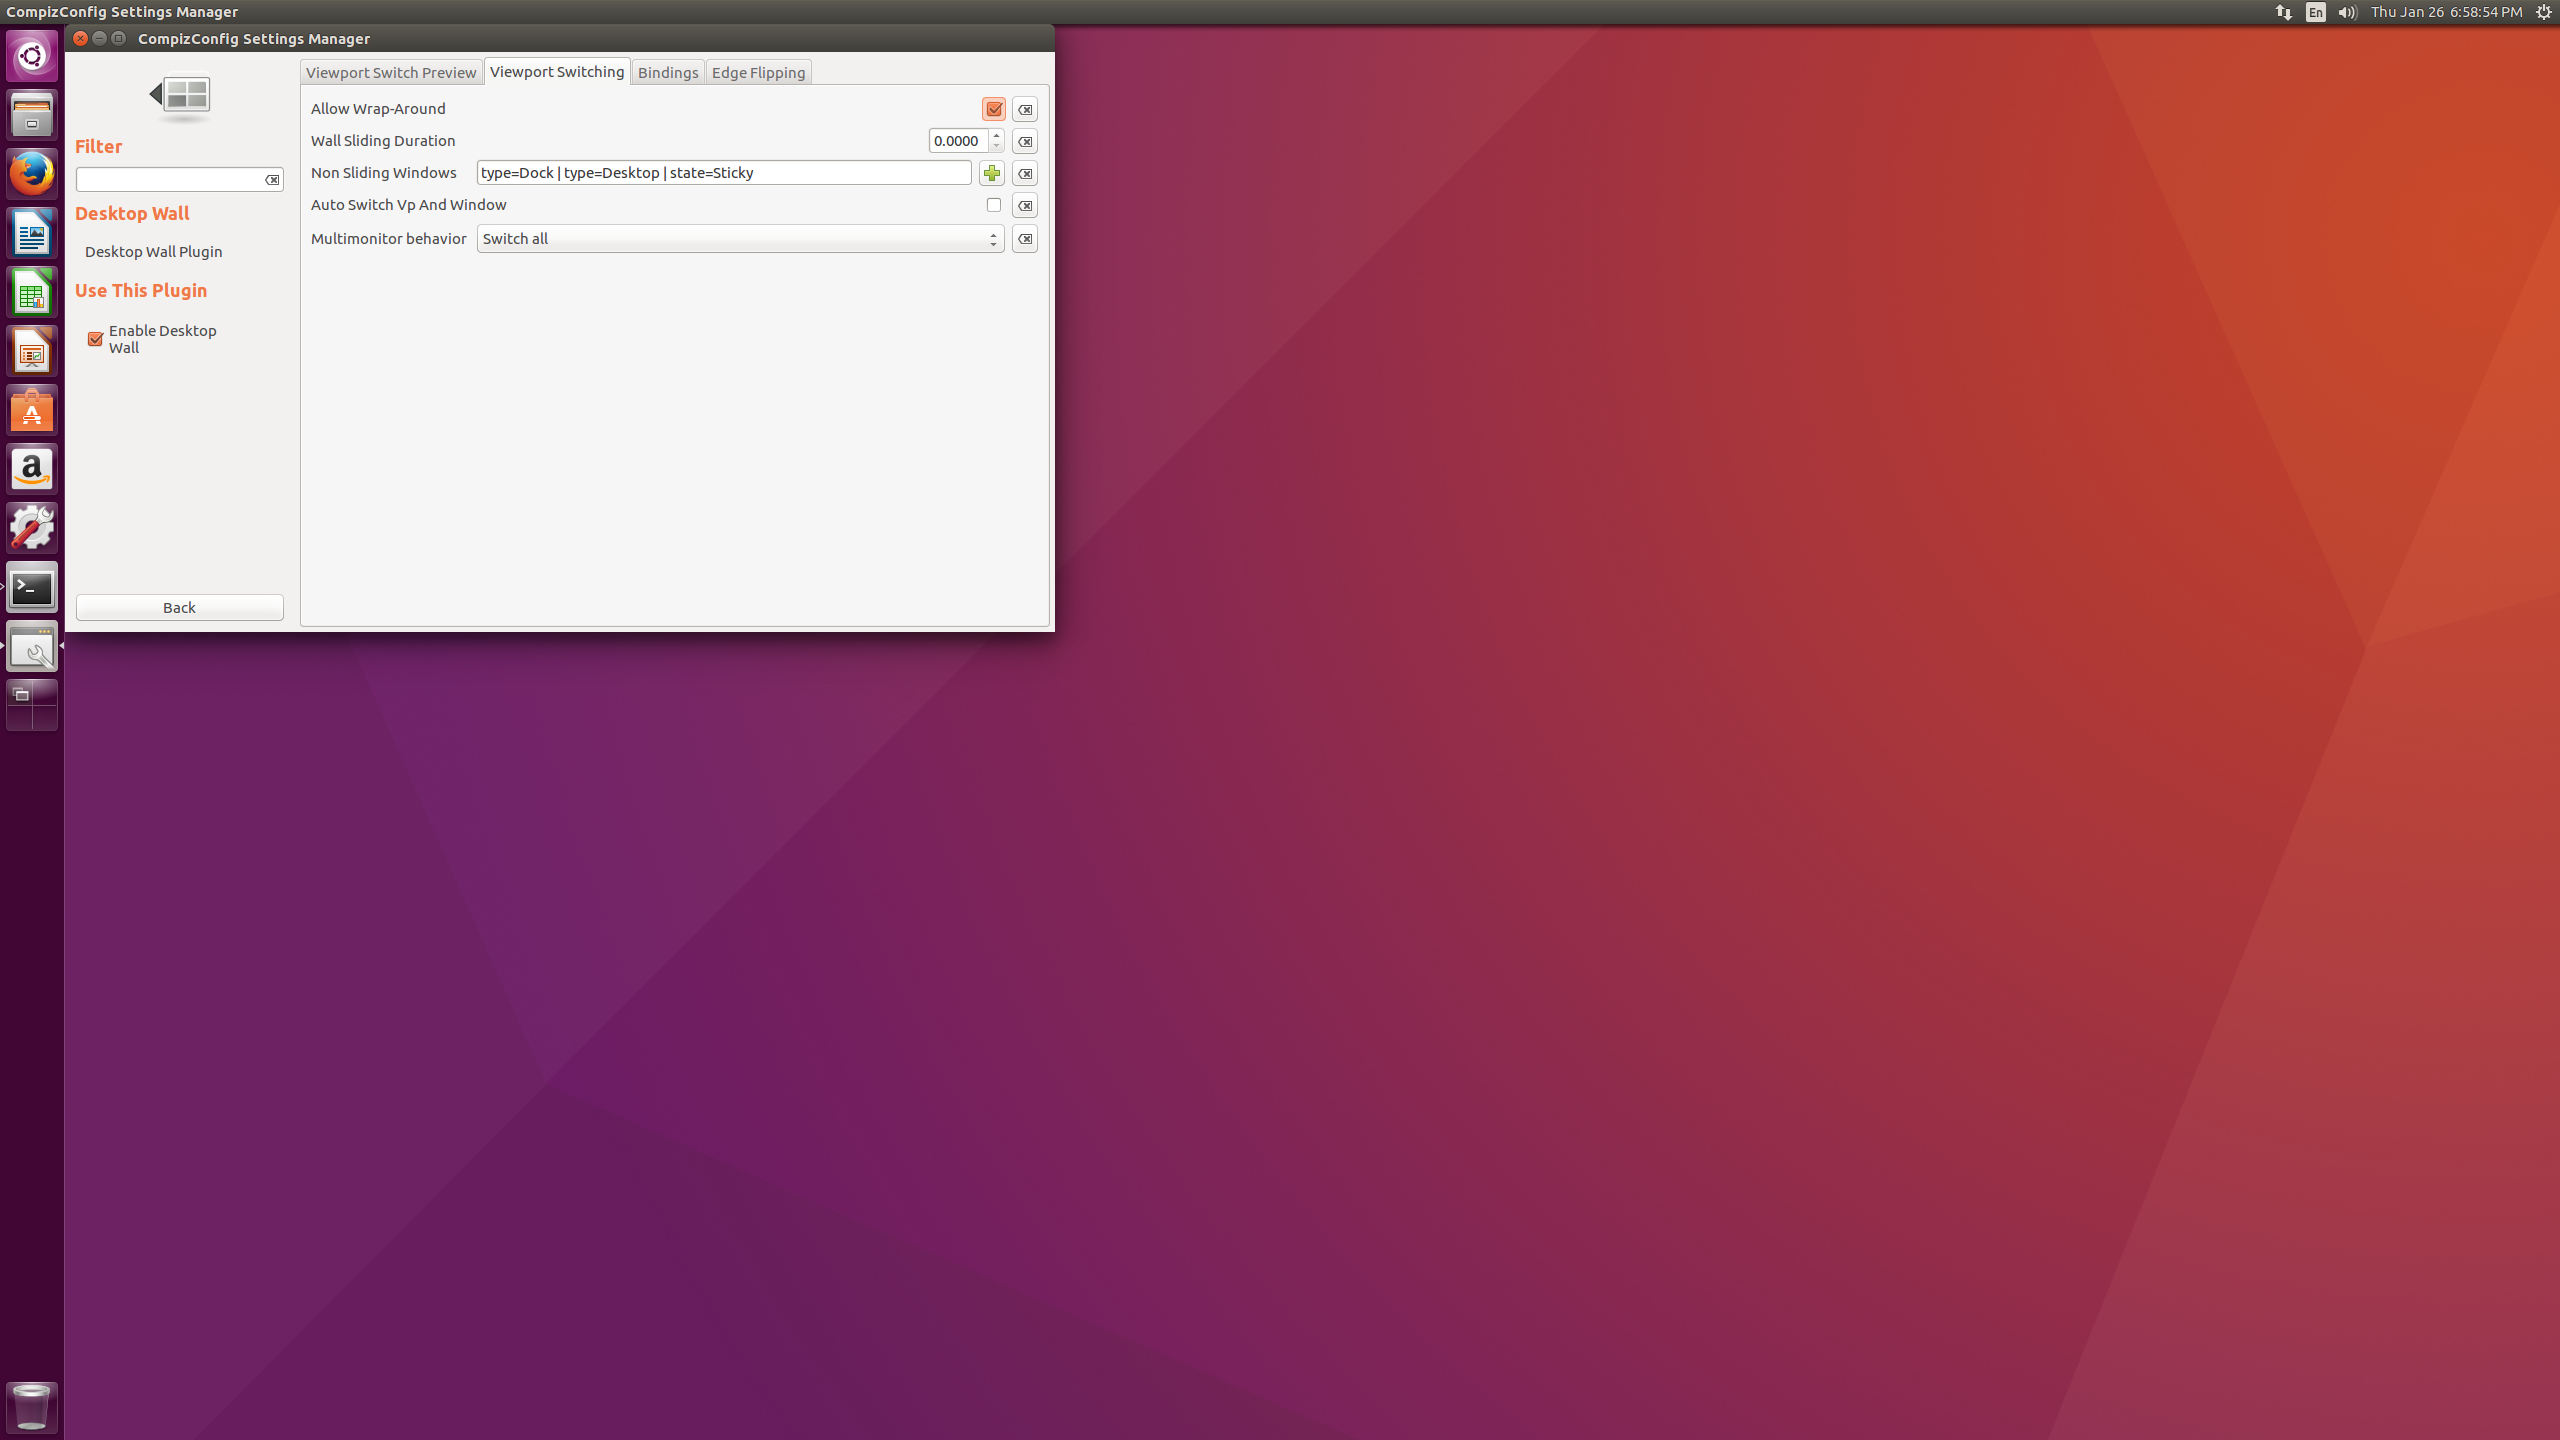
Enable Workspace Wrapping
Make sure the Allow Wrap-Around box is checked. Click the Back button in the bottom left to return to the previous menu. You can explore ccsm to your hearts desire, there are a lot of interesting features. But for now close ccsm and lets make some changes with unity-tweak-tool.
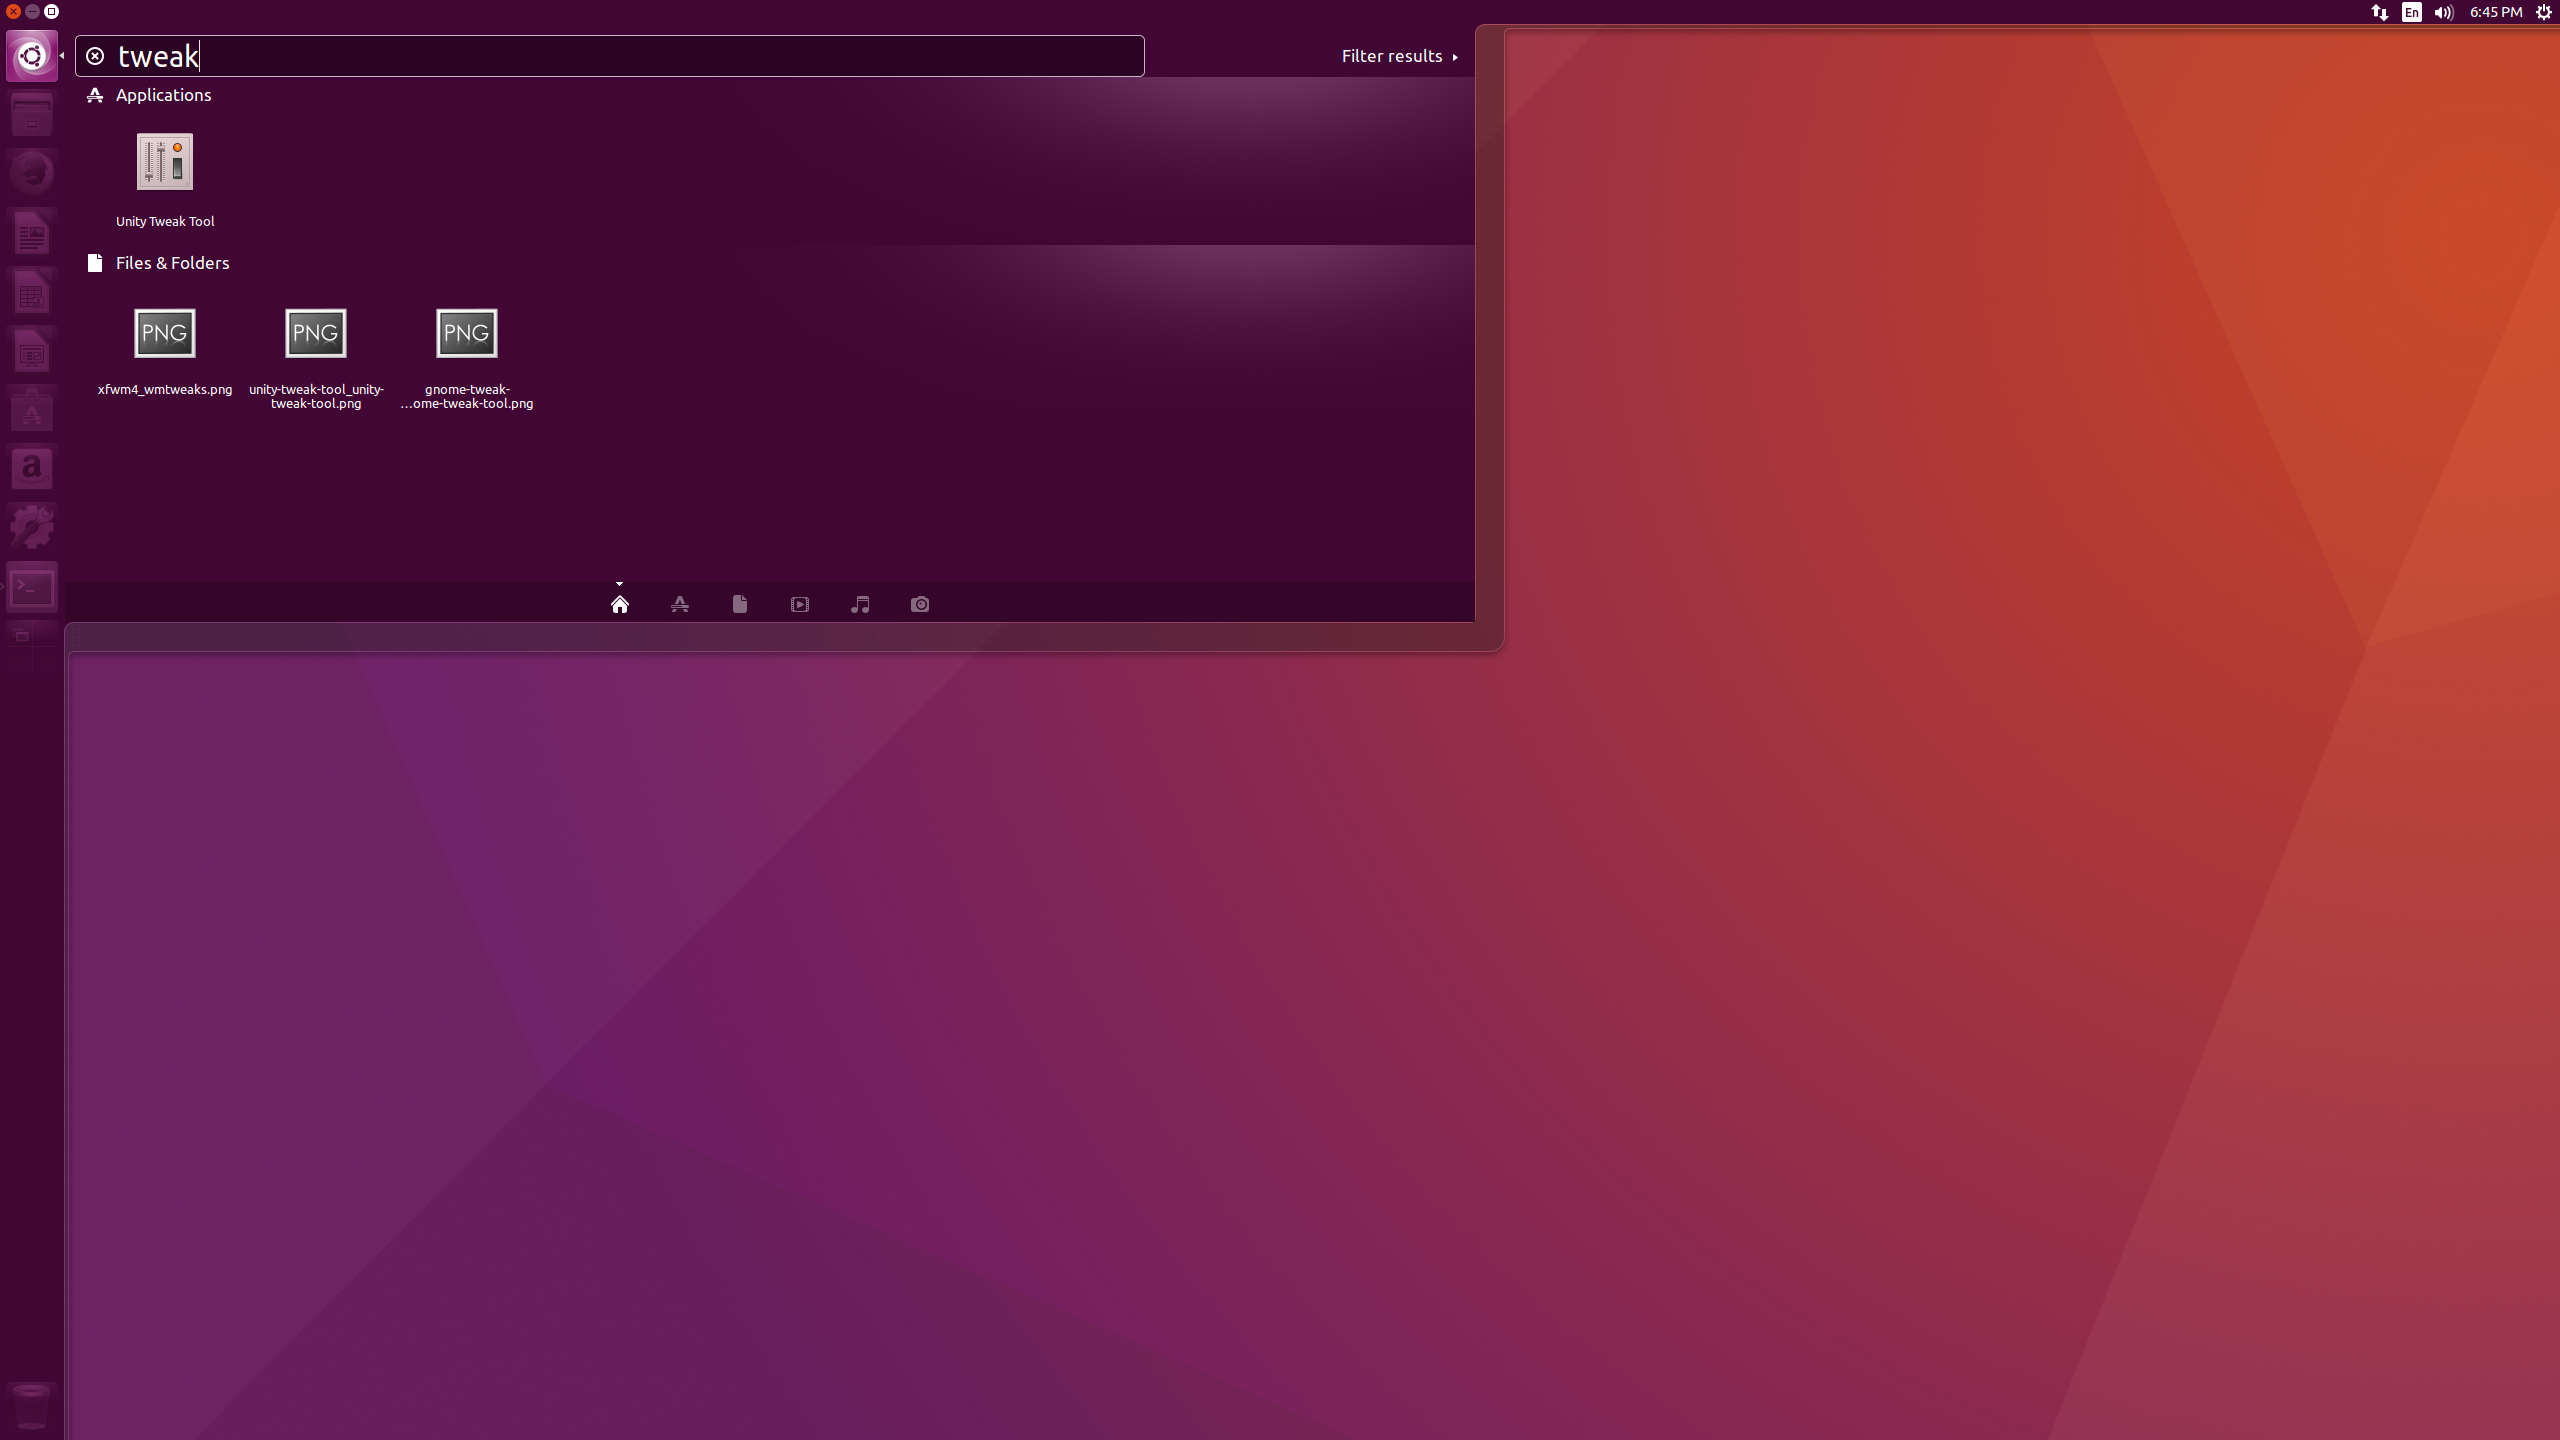
Launch Unity Tweak Tool
Using the launcher, type tweak and arrow to Unity Tweak Tool and hit enter.
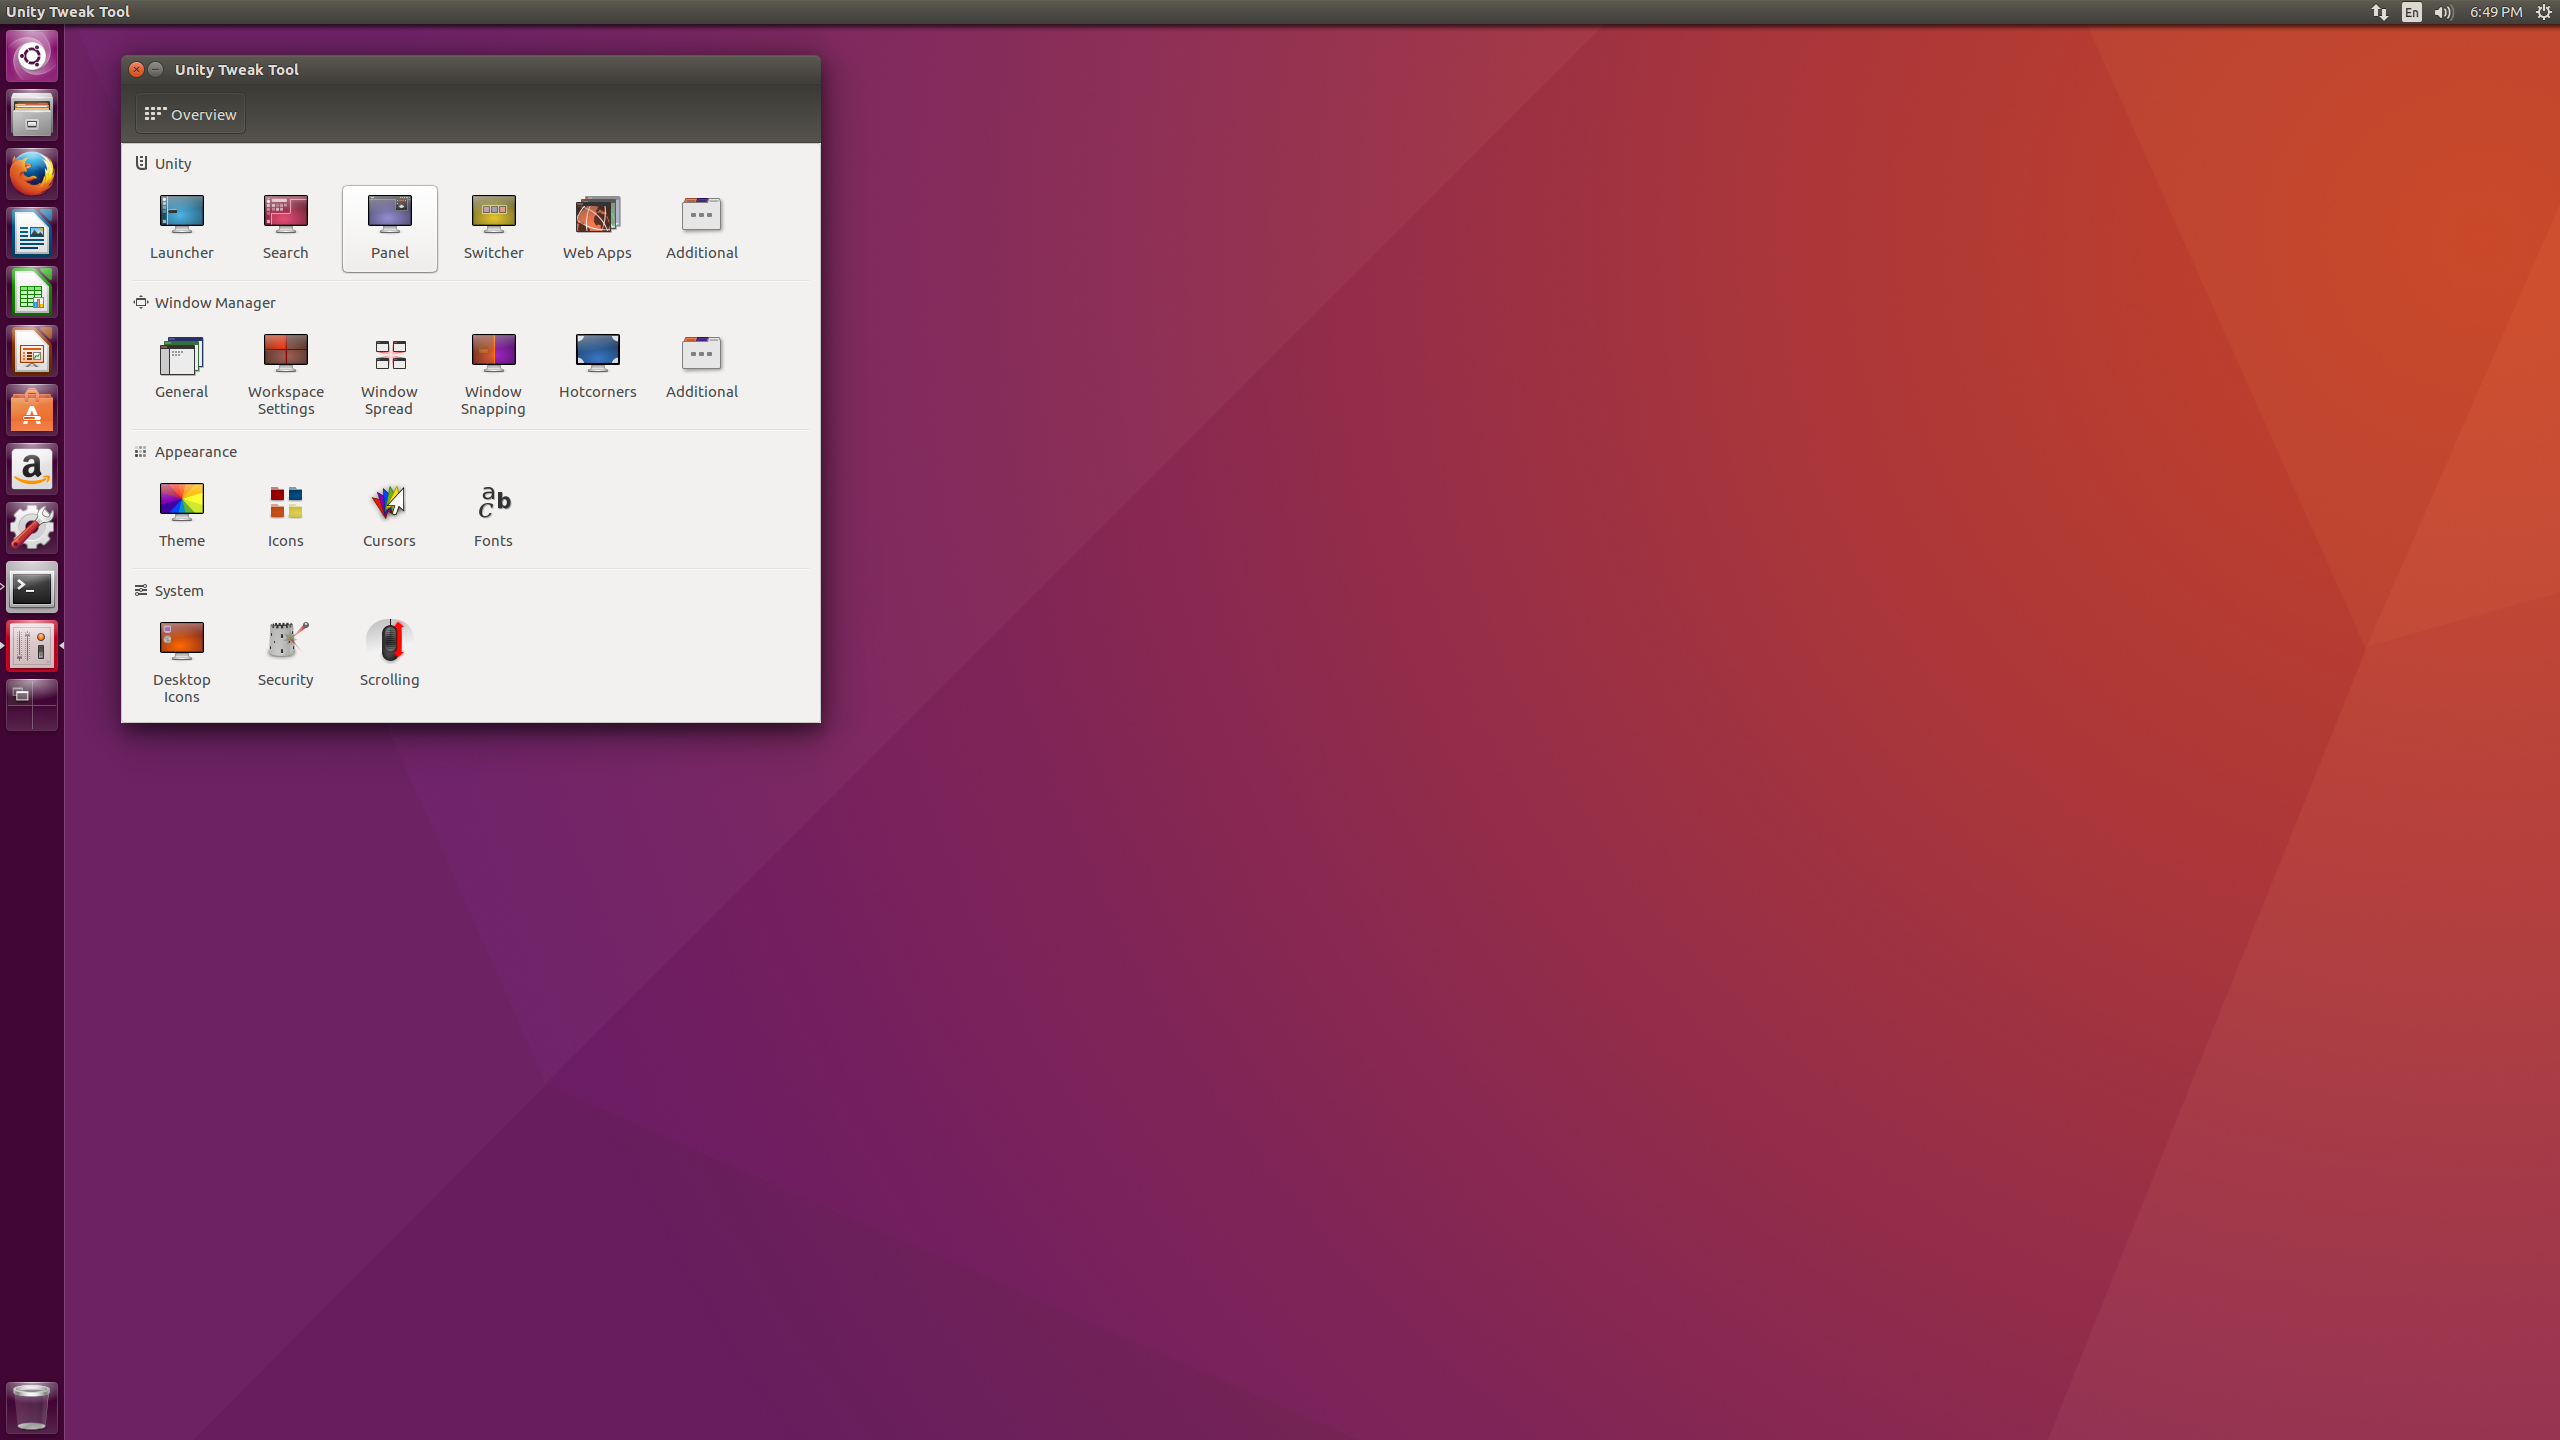
Panel Tab
Select the Panel button in the top row.
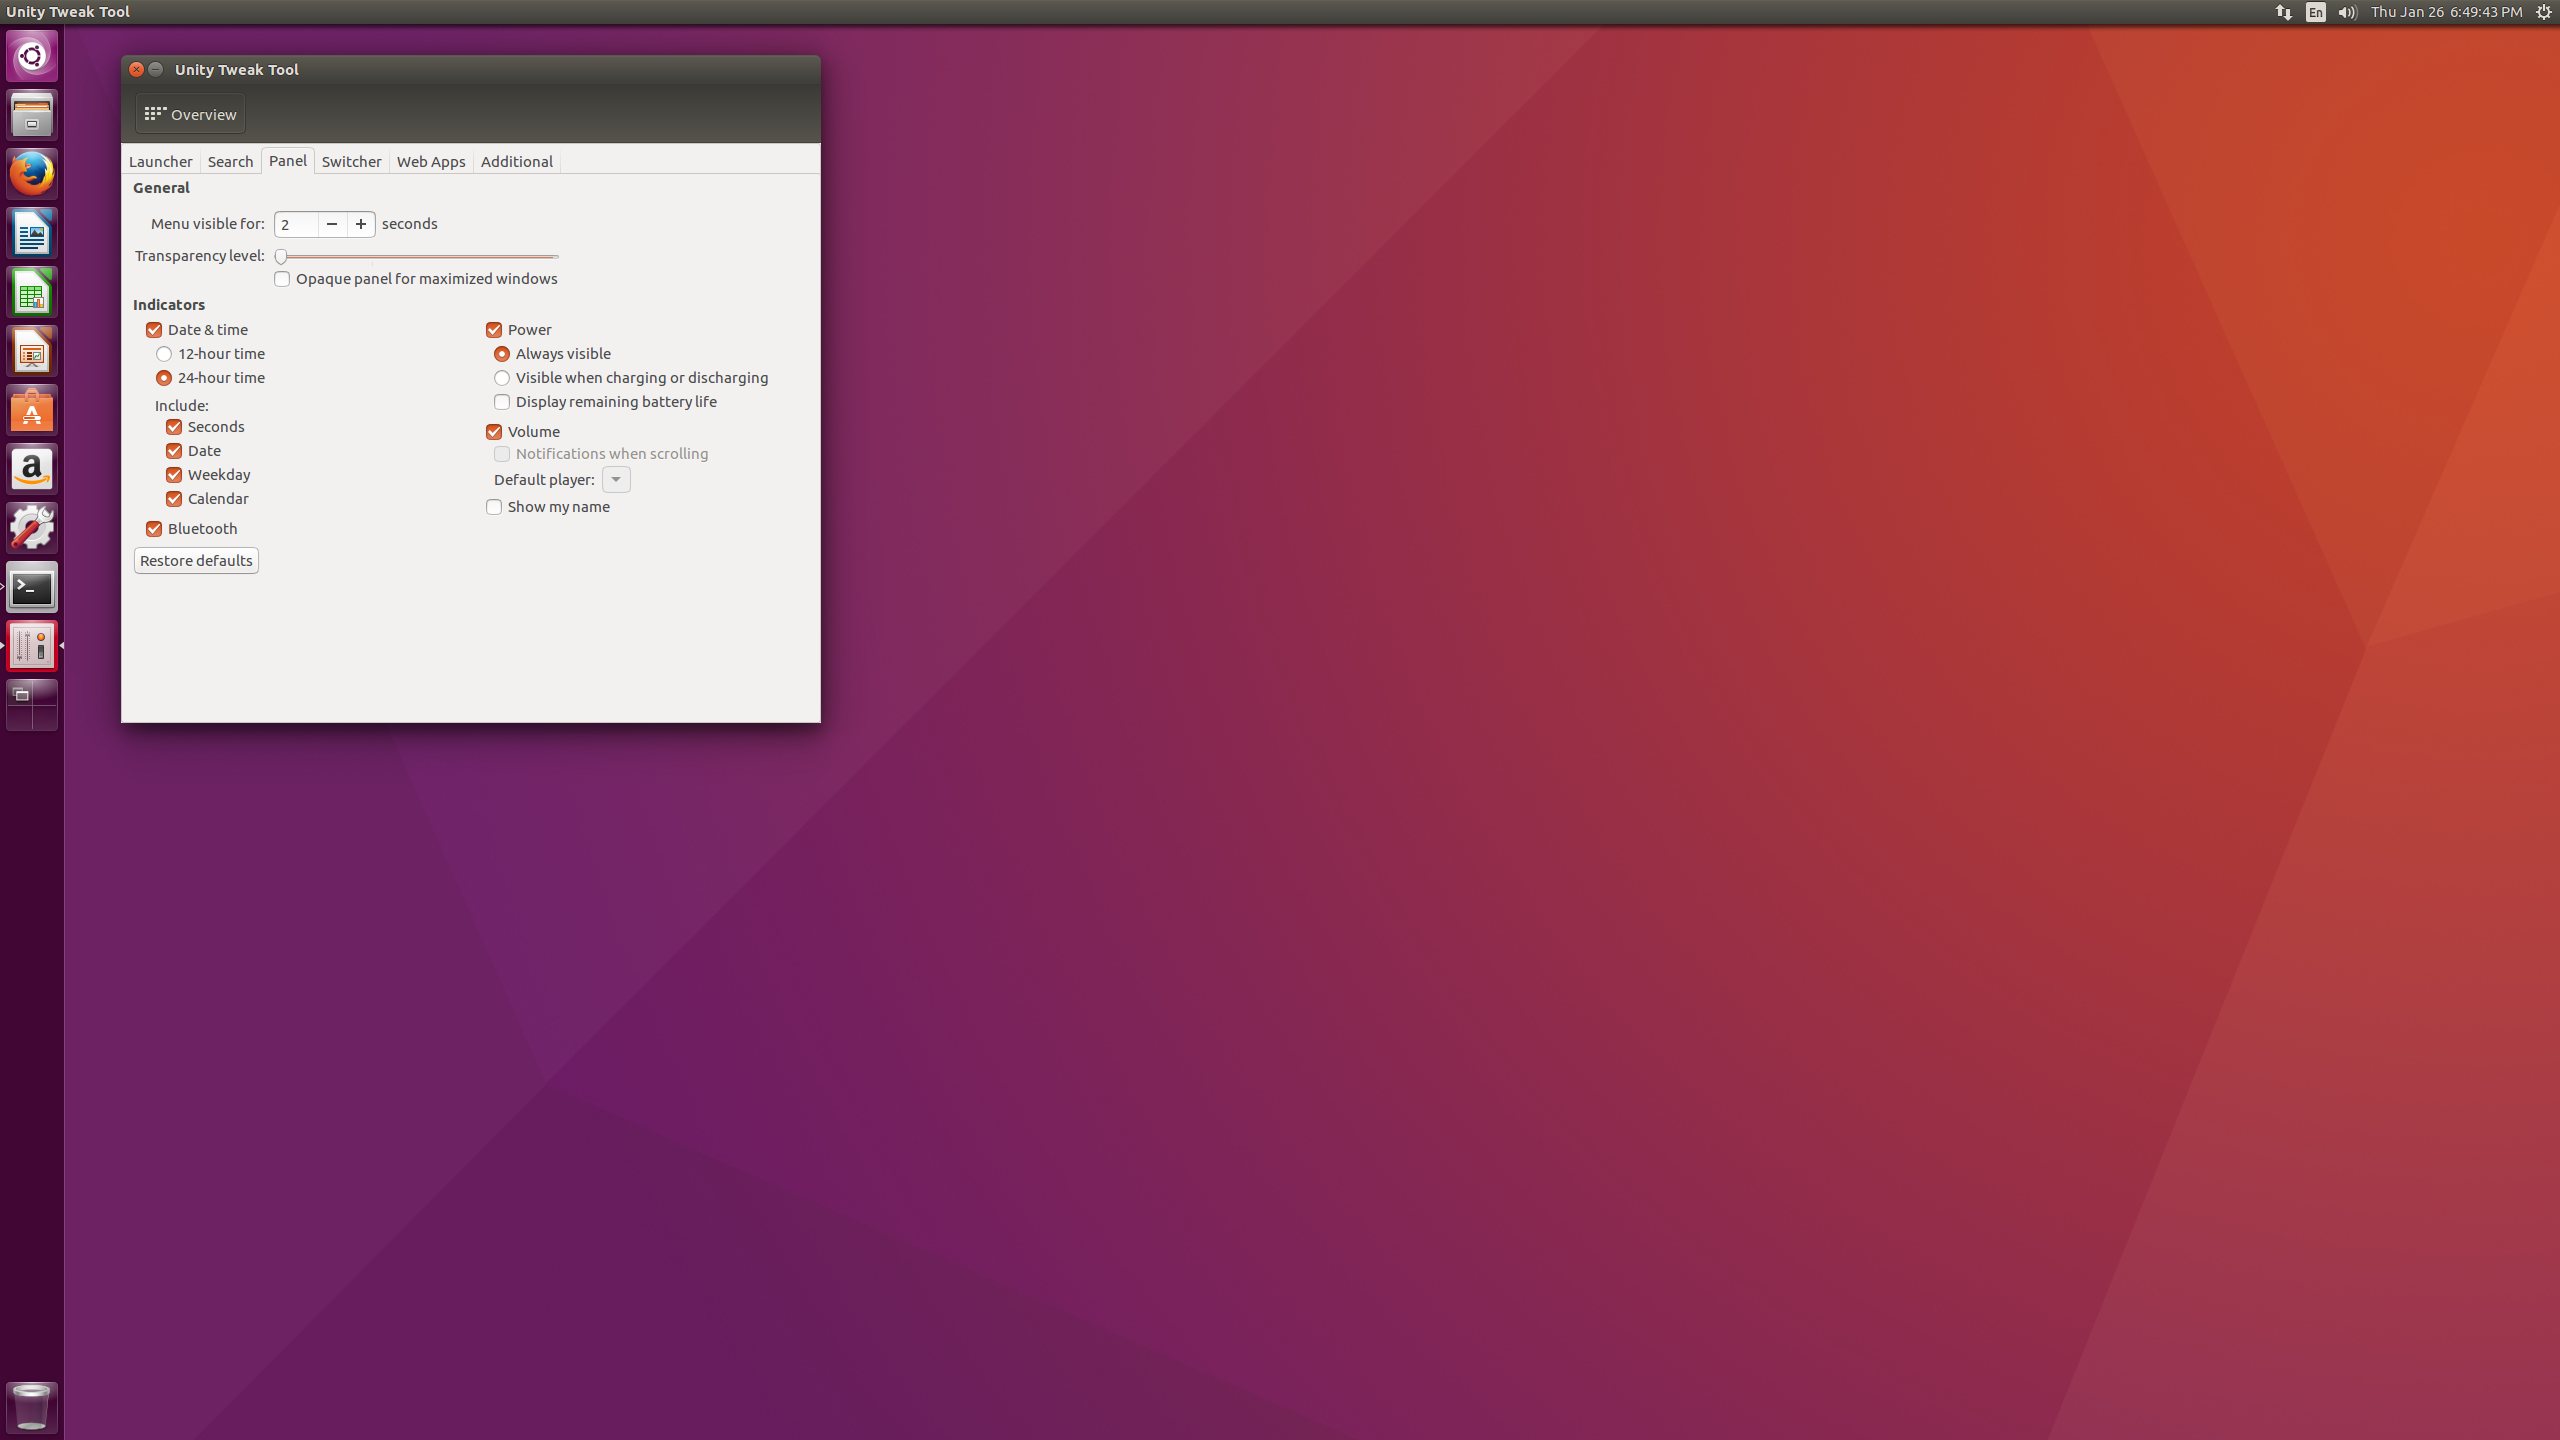
Tweak Example
I went ahead and checked all the time boxes on the left to display seconds etc. Click on the Overview button at the top to return to the previous menu.

Additional
Select the Additional button in the second row.
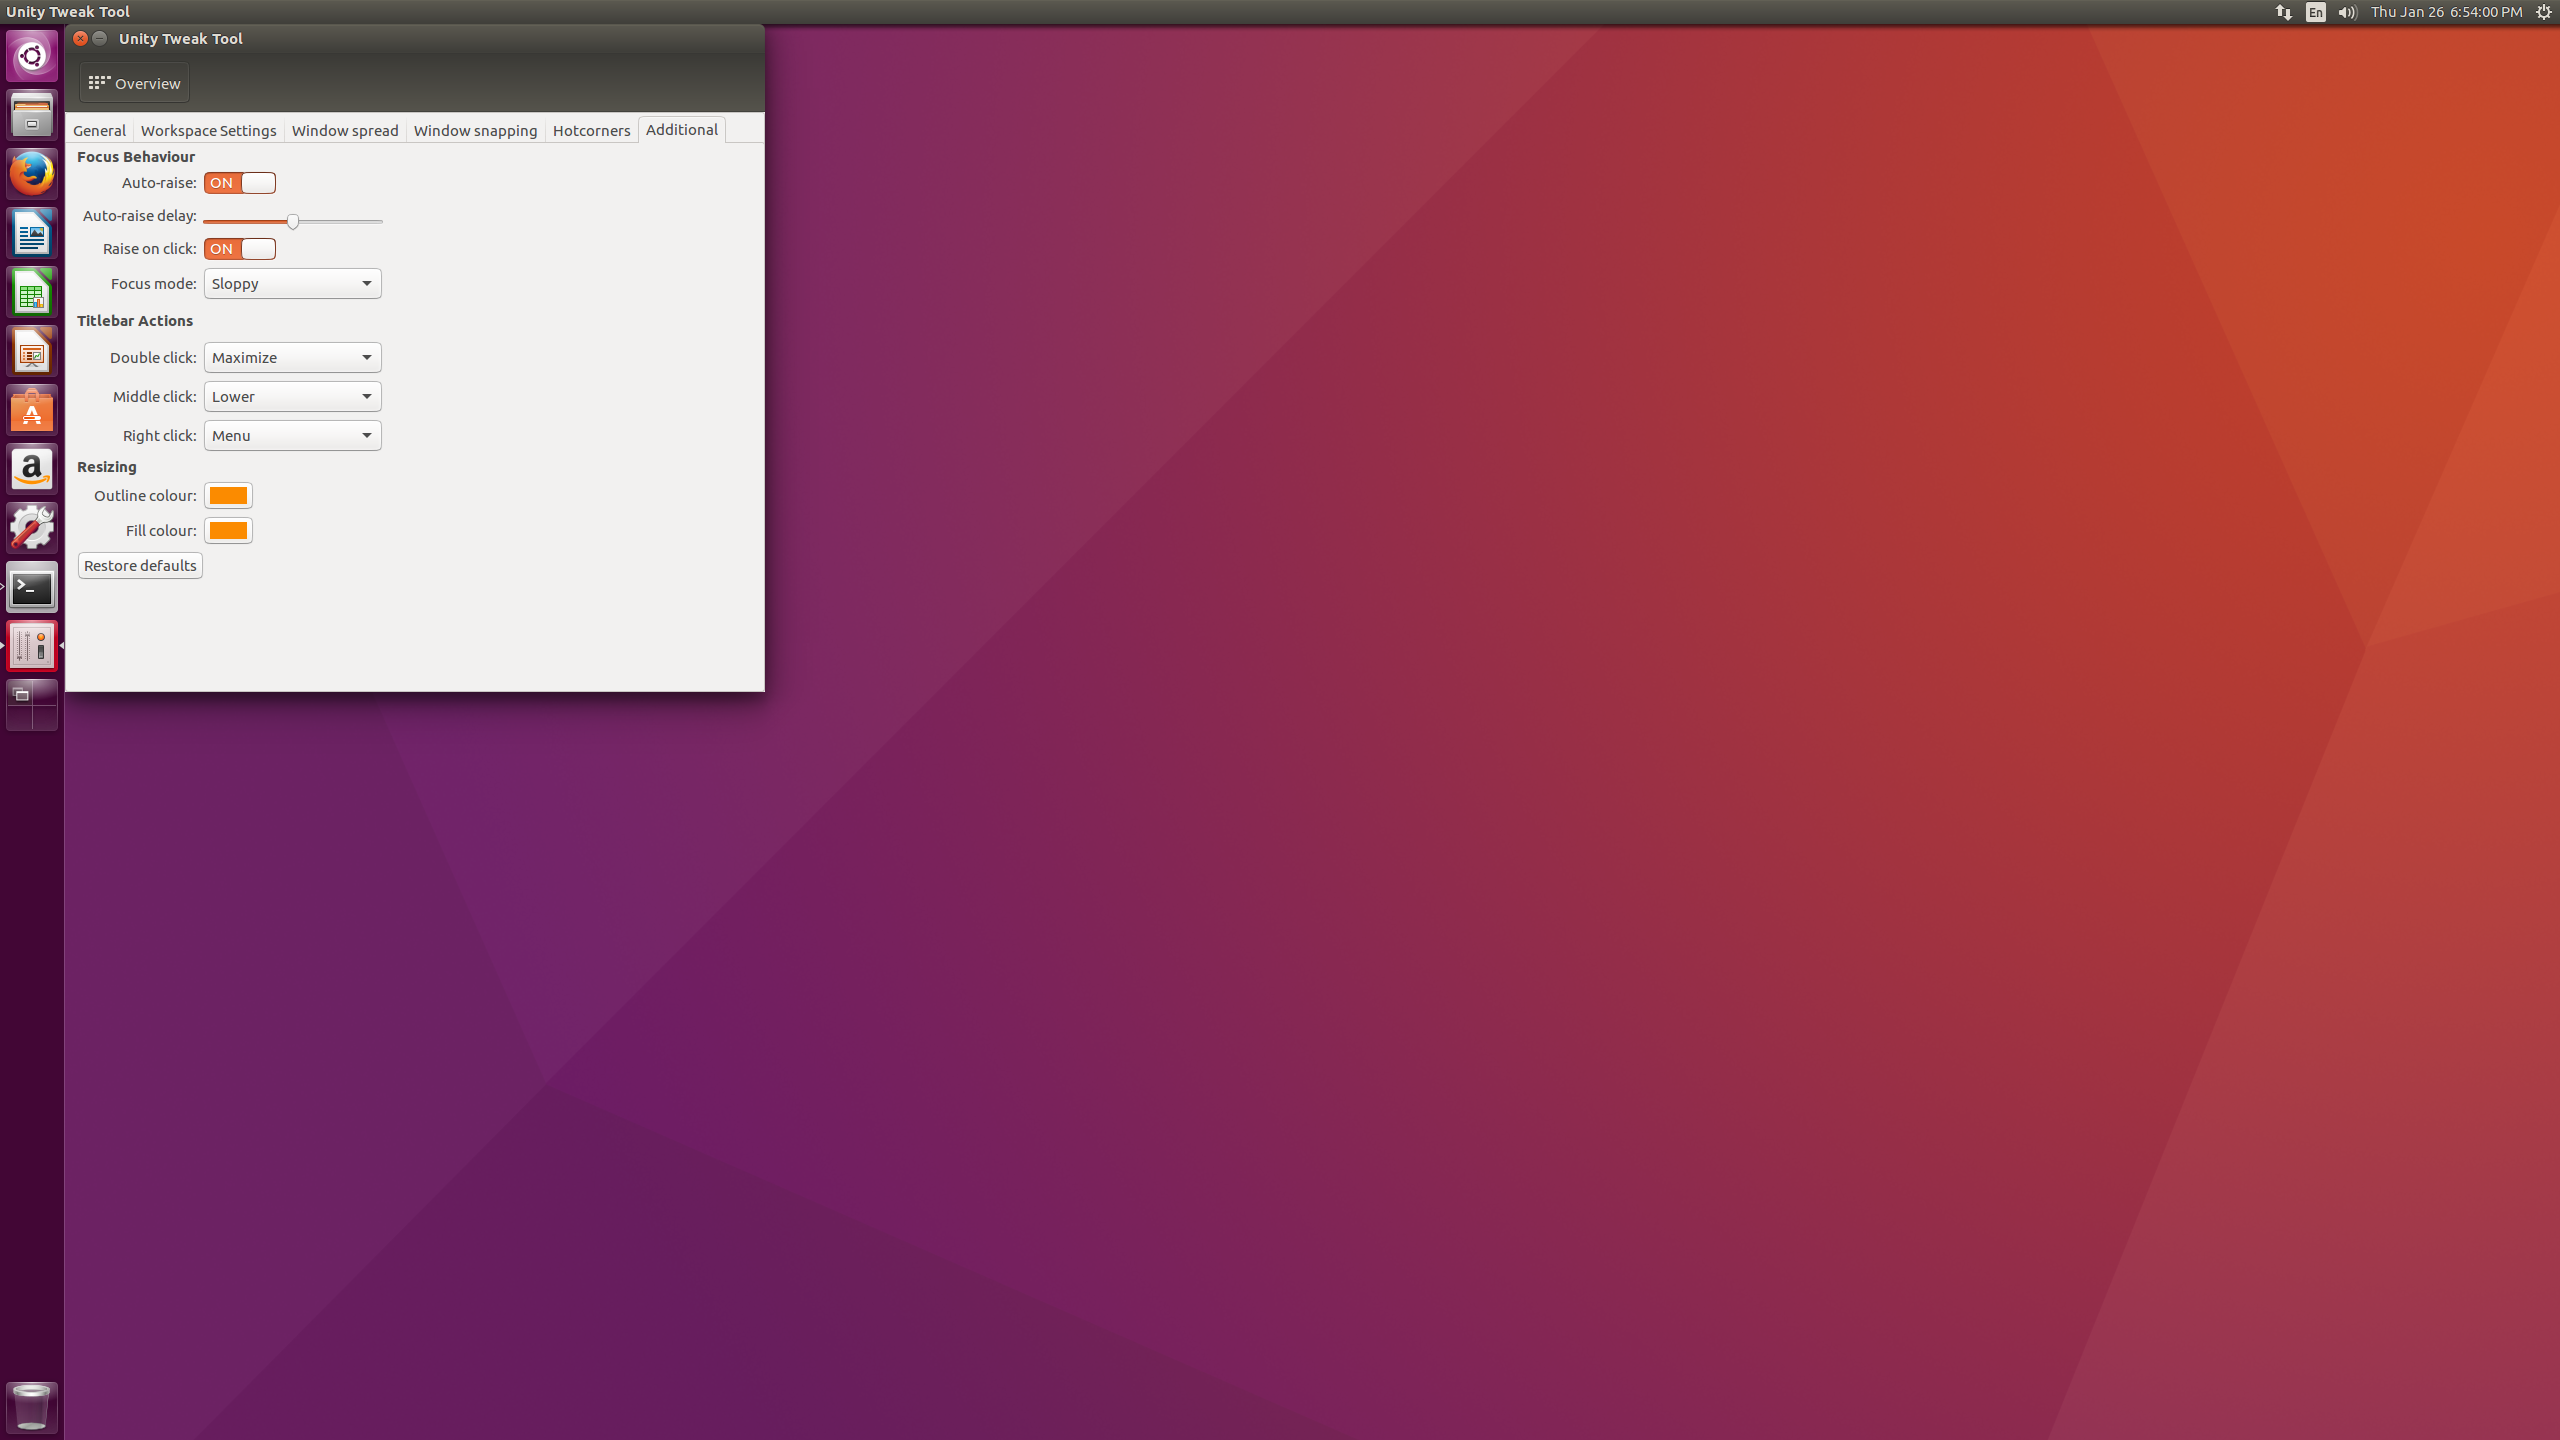
Sloppy Mouse and Auto-Raise
Sloppy focus means that keyboard keys entered will get sent to whatever program the mouse is hovering over. You may strongly dislike this, if so change it back to click. Auto-raise brings the window your mouse is hovering over to the top after a little bit. You may want to disable this too.
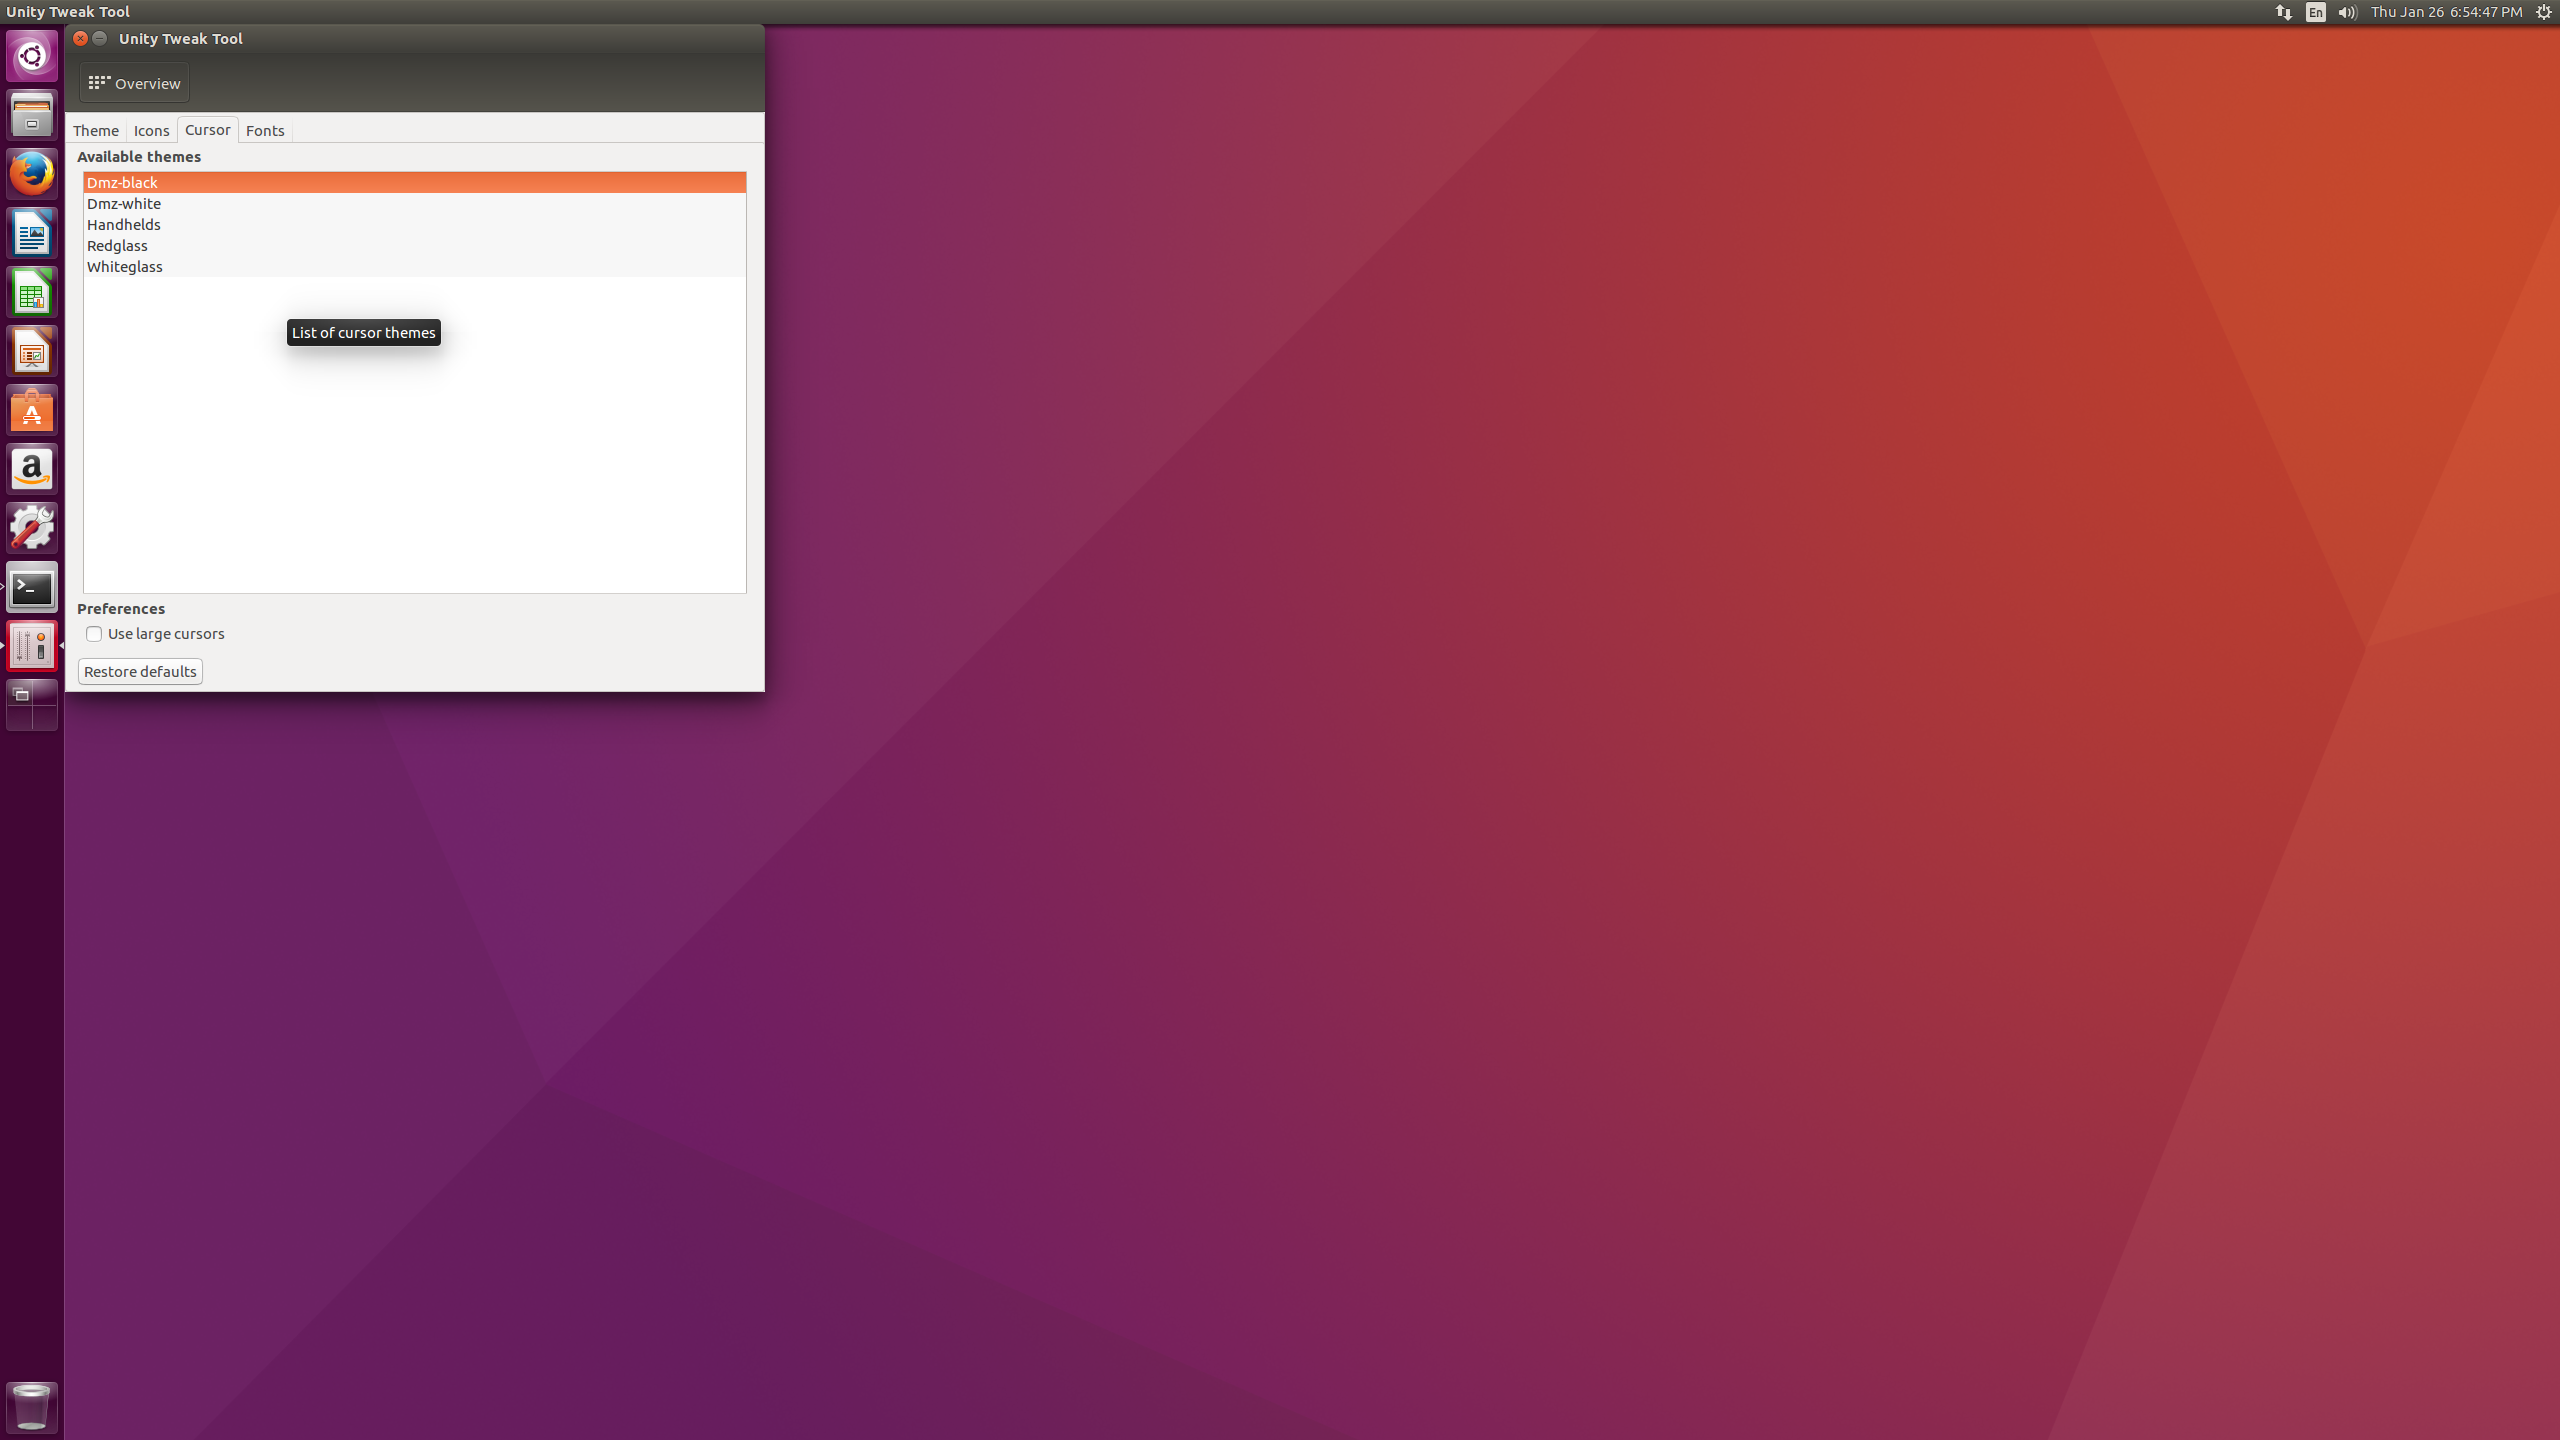
Tweak Example
You can easily, for example, choose a black cursor.
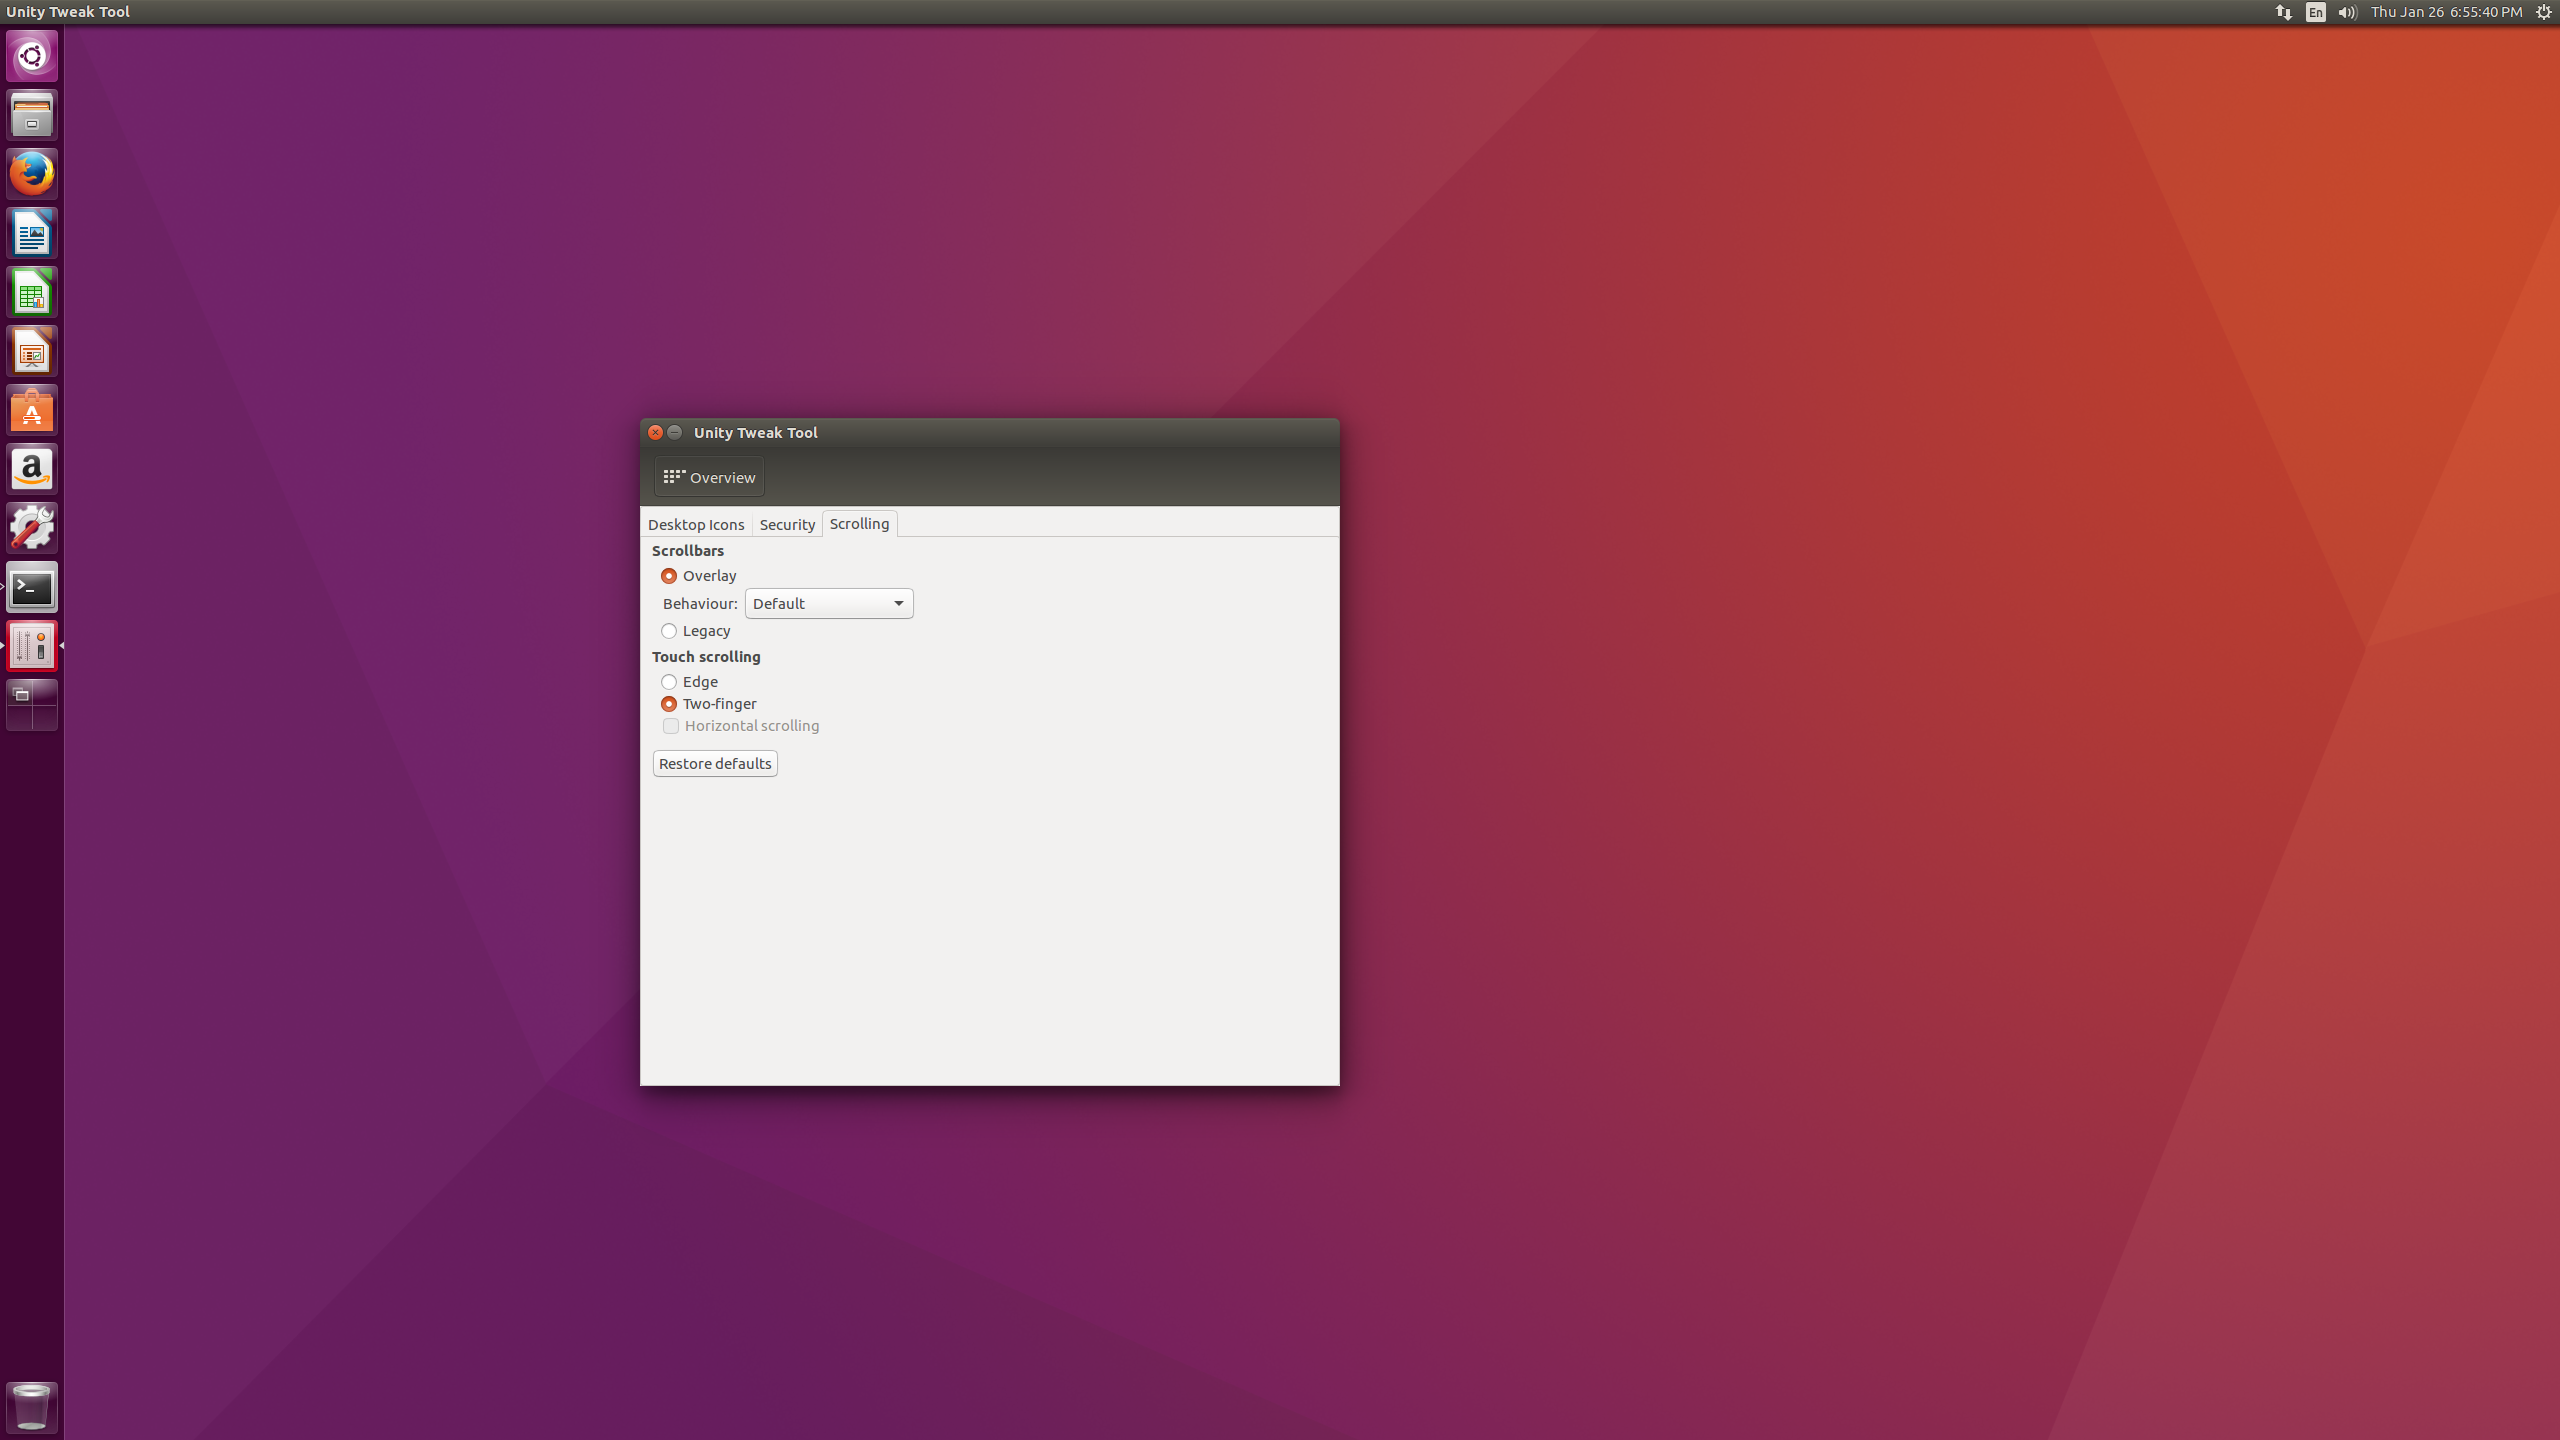
Tweak Example
You can also enable two-finger scrolling if your trackpad supports it.
Coming soon!